The Bee-loud Glade…

June 25th back garden.. (8)
28th May bank Holiday Monday front garden (6)

Weeded, watered, minded..the front garden

May 23rd, home from holidays (13)

The ignored back garden..

We live in a funny kind of house – the sun mostly shines on our (non-overlooked) front garden, and only in high summer does it hit the back.

In winter-time, the back garden has been described (by me, mostly) as ‘the place where the sun never shines’. This is factually correct and goes some way, perhaps, to explaining why we’ve never paid the back garden a lot of attention. We get the grass (it’s not really grass – it’s moss and weeds) cut every two weeks in the summer time, and come October we bid it farewell for another year.

At least that’s what we used to do, until our long-time gardener threw in the towel. In the 2 months since its first cut, it’s turned into a bit of a jungle.

June 25th back garden.. (7)

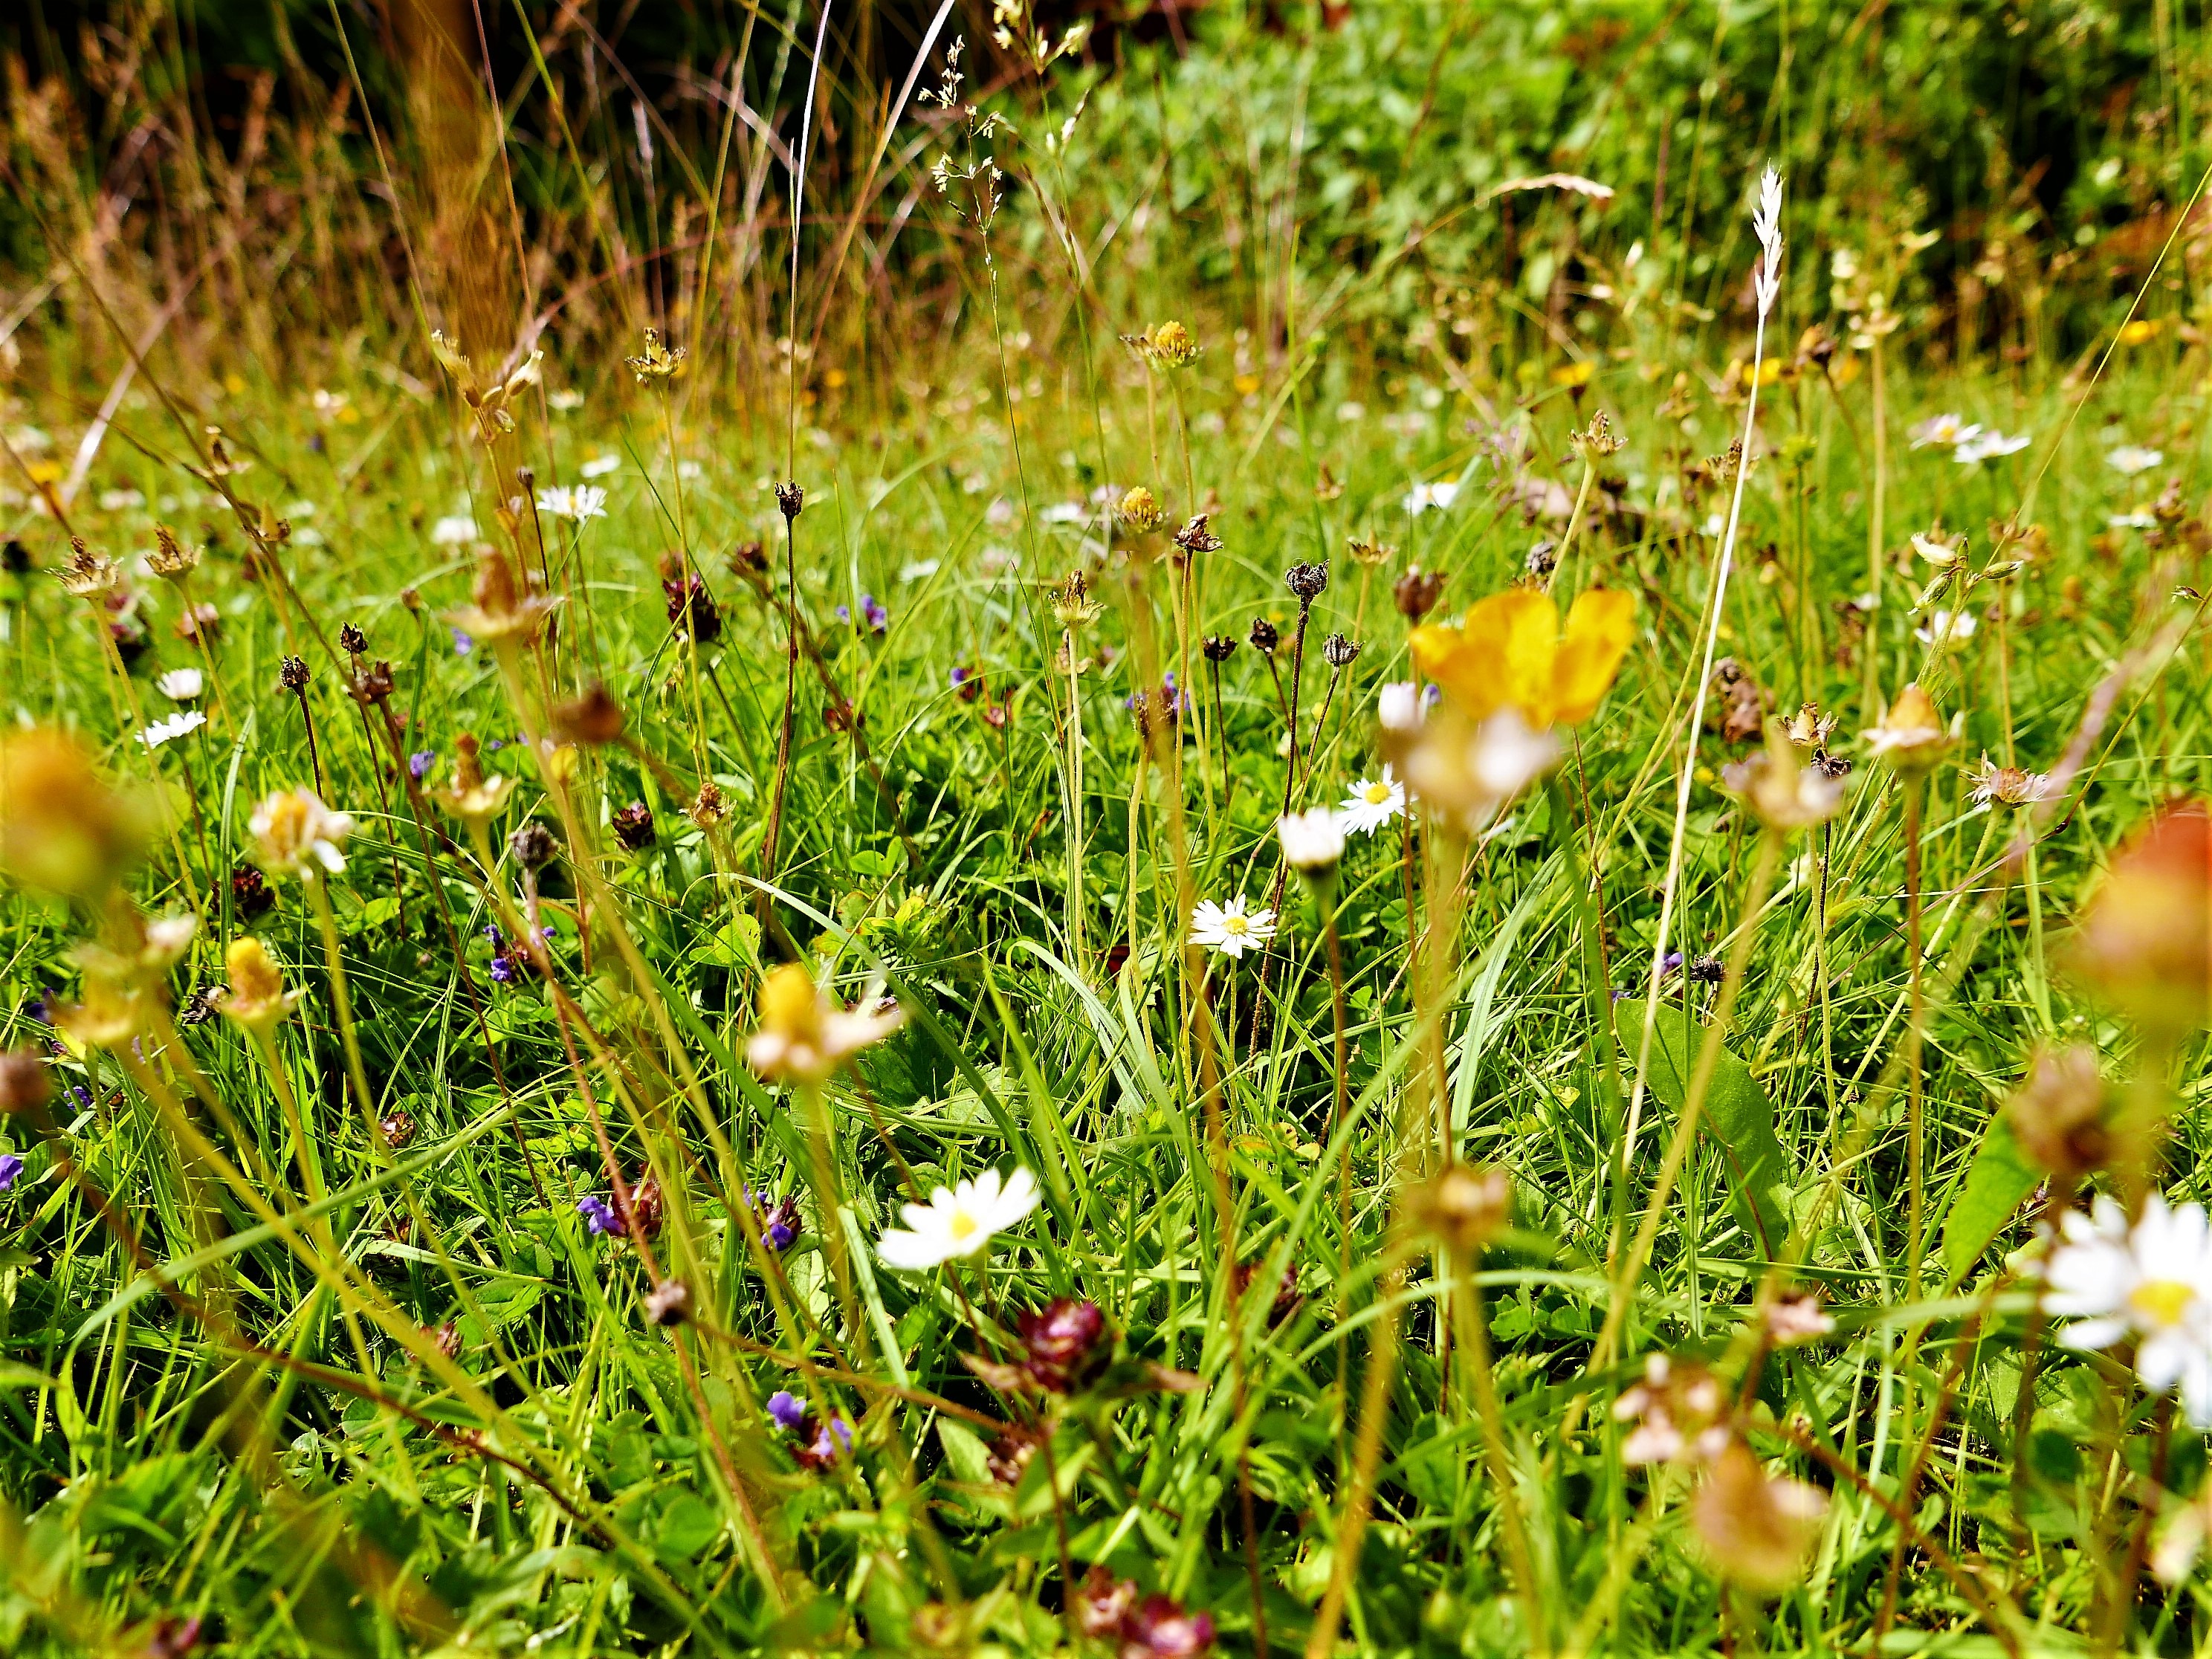
It’s a jungle out there..

But today there’s a new man on the horizon, and he’s coming this afternoon.

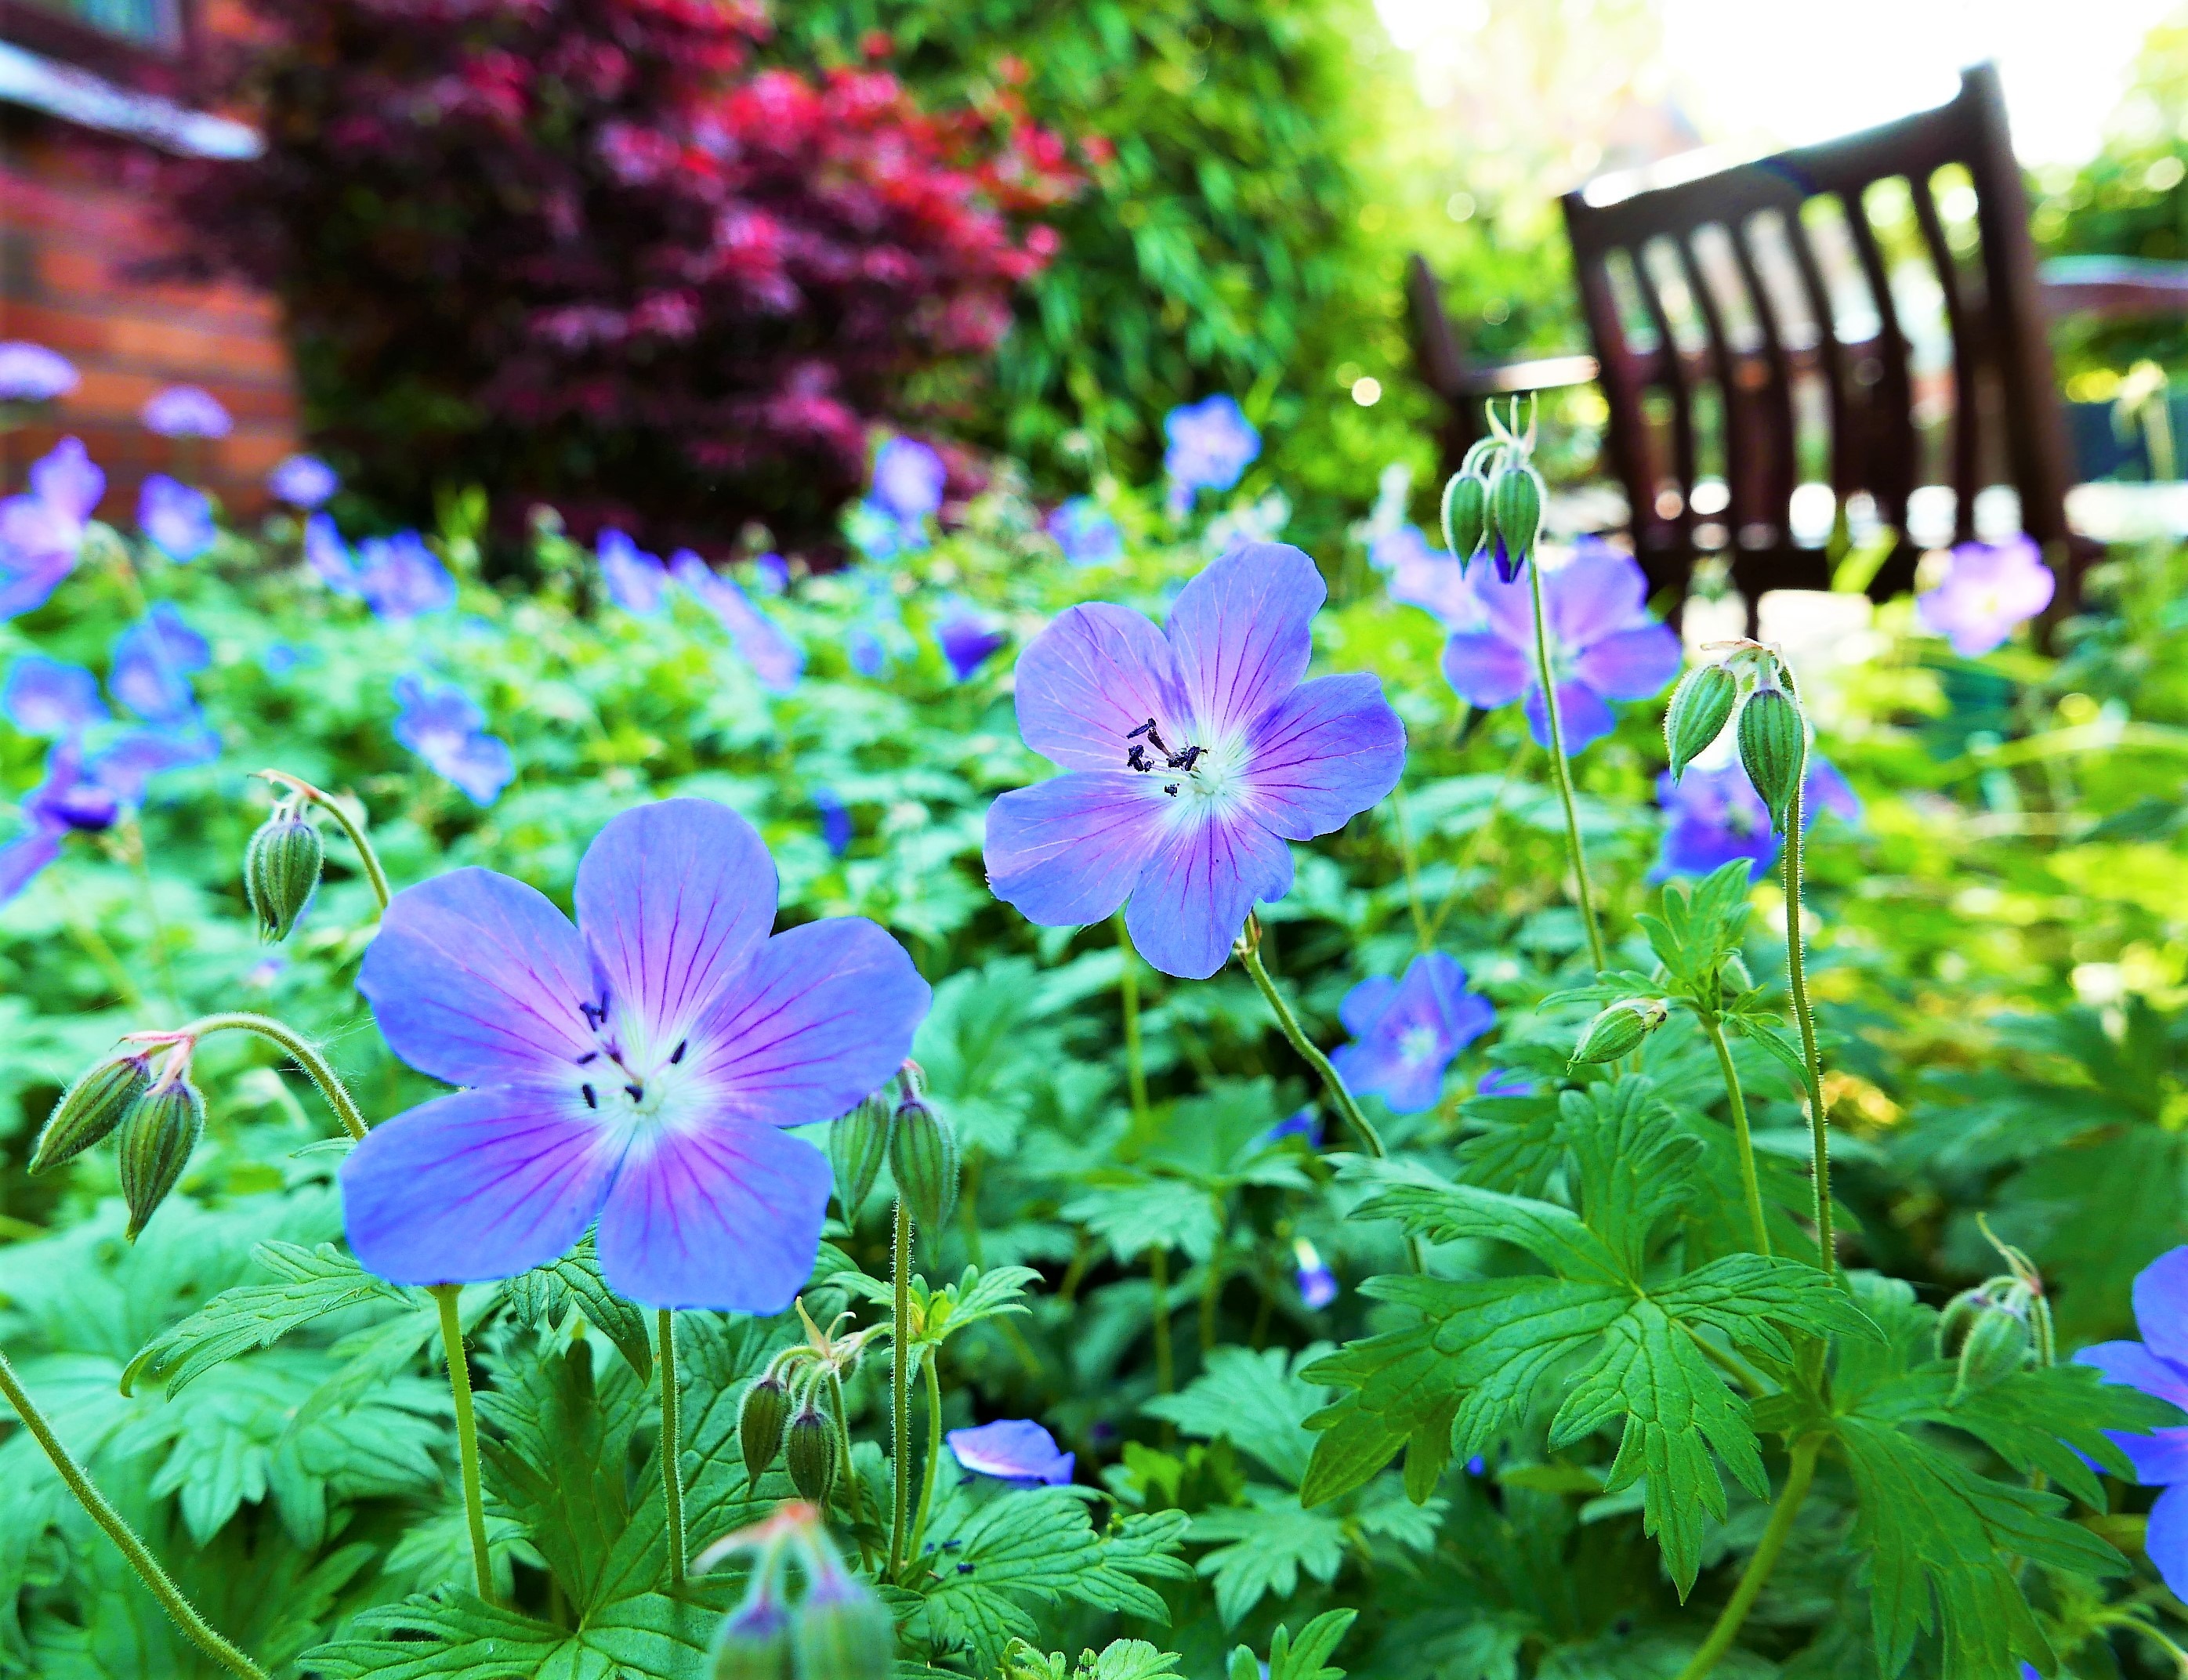
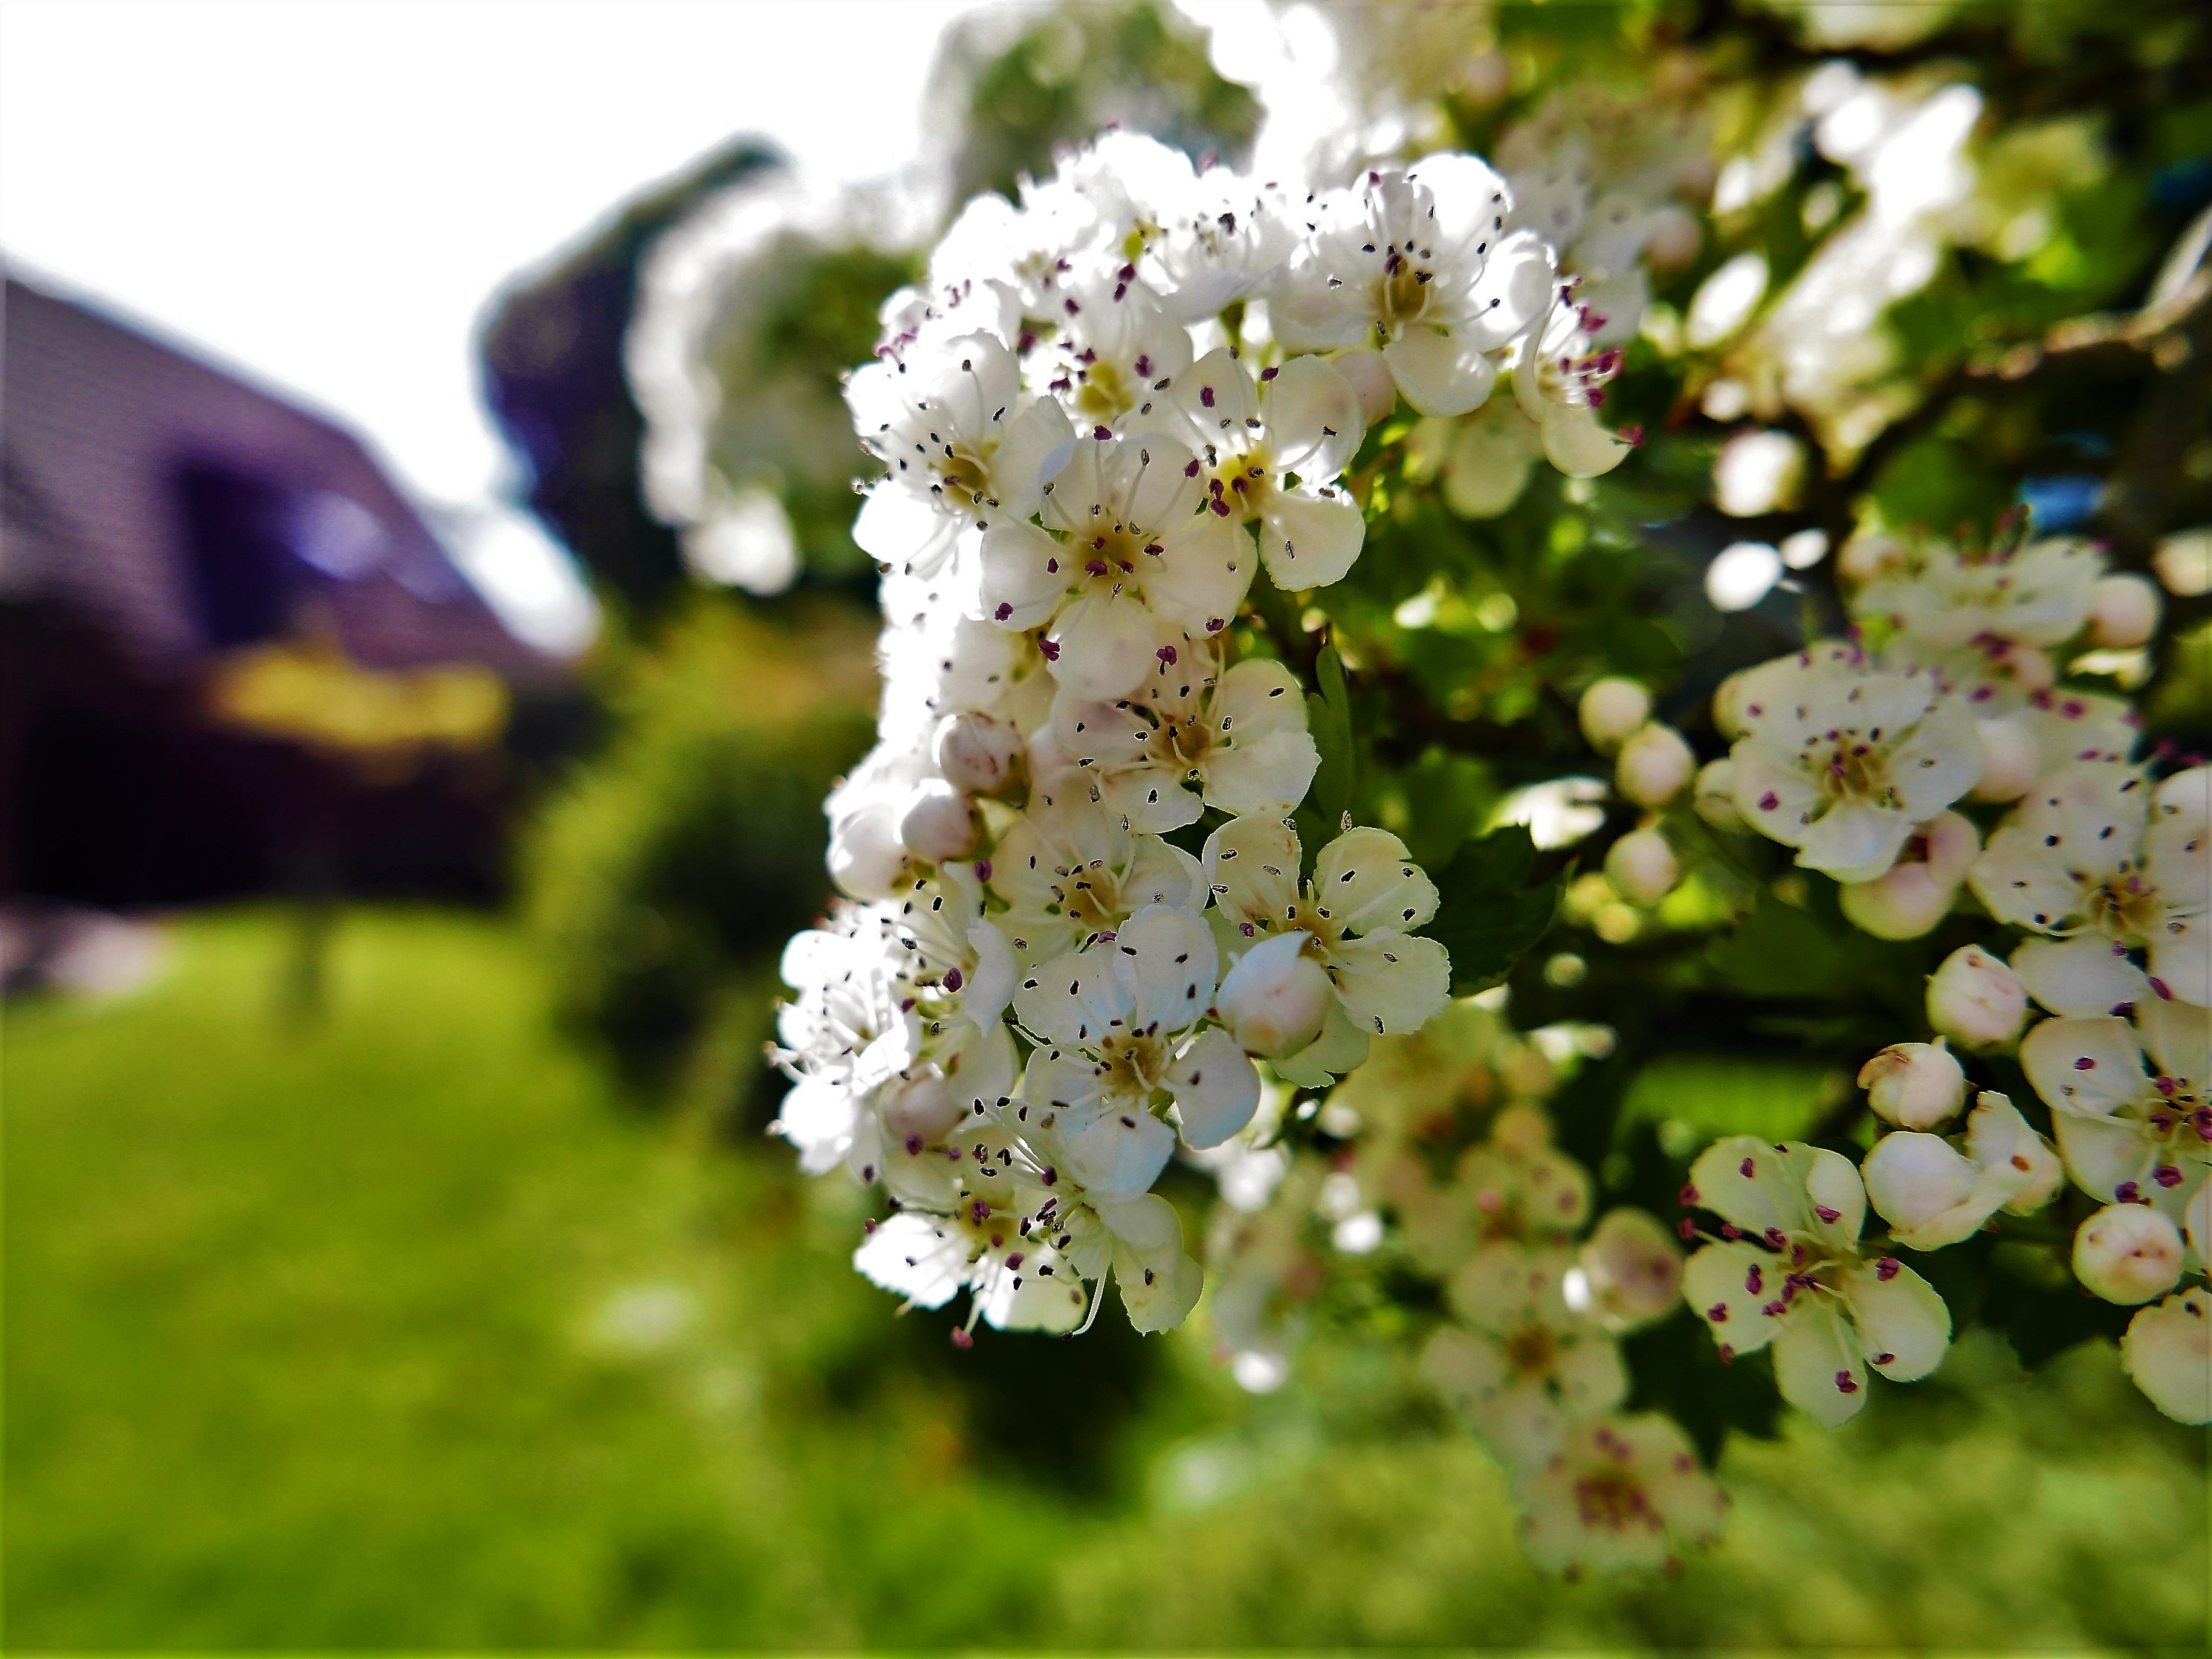
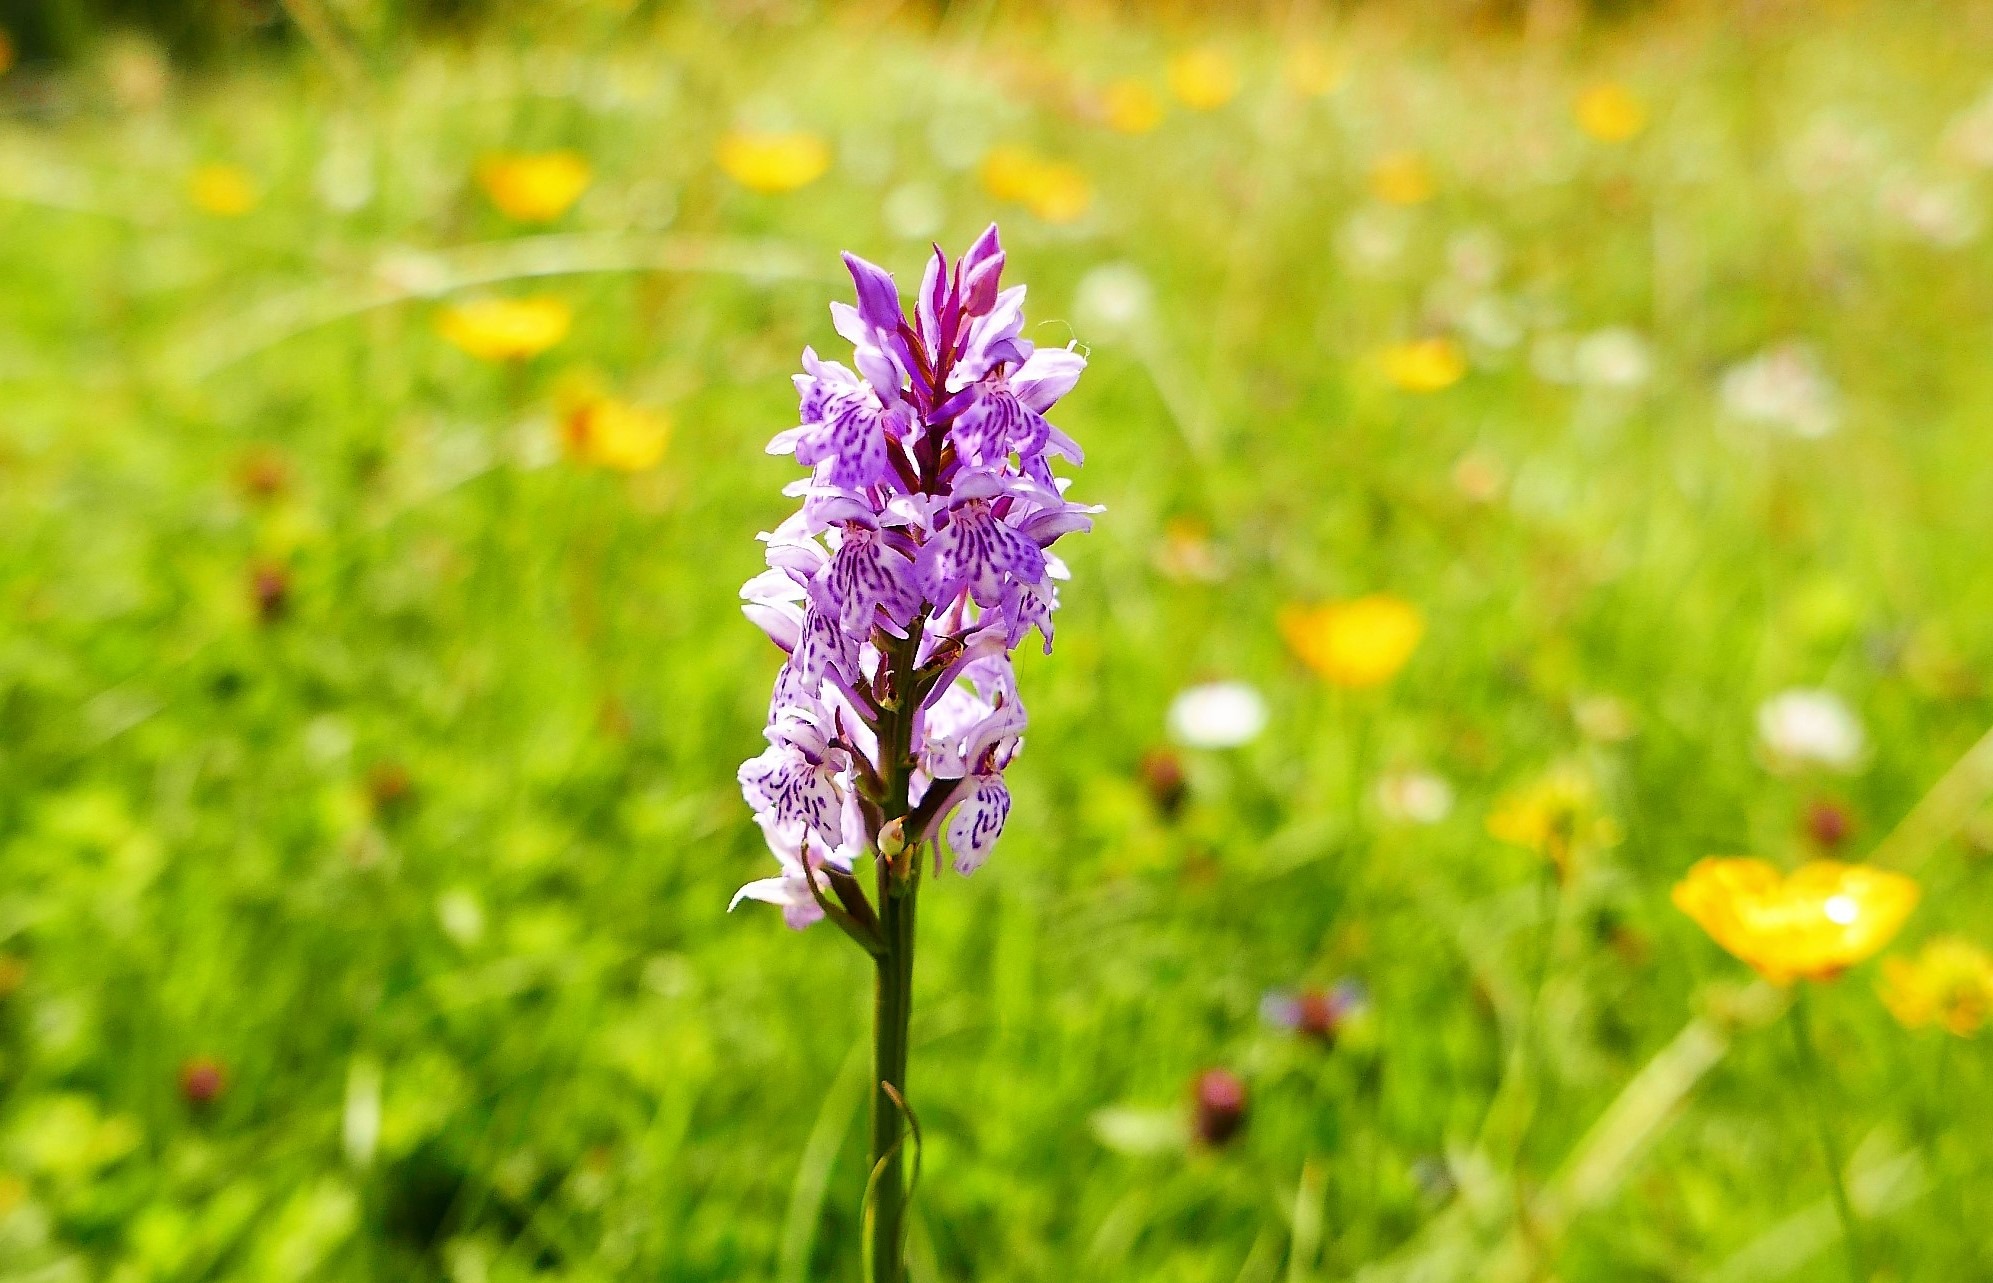
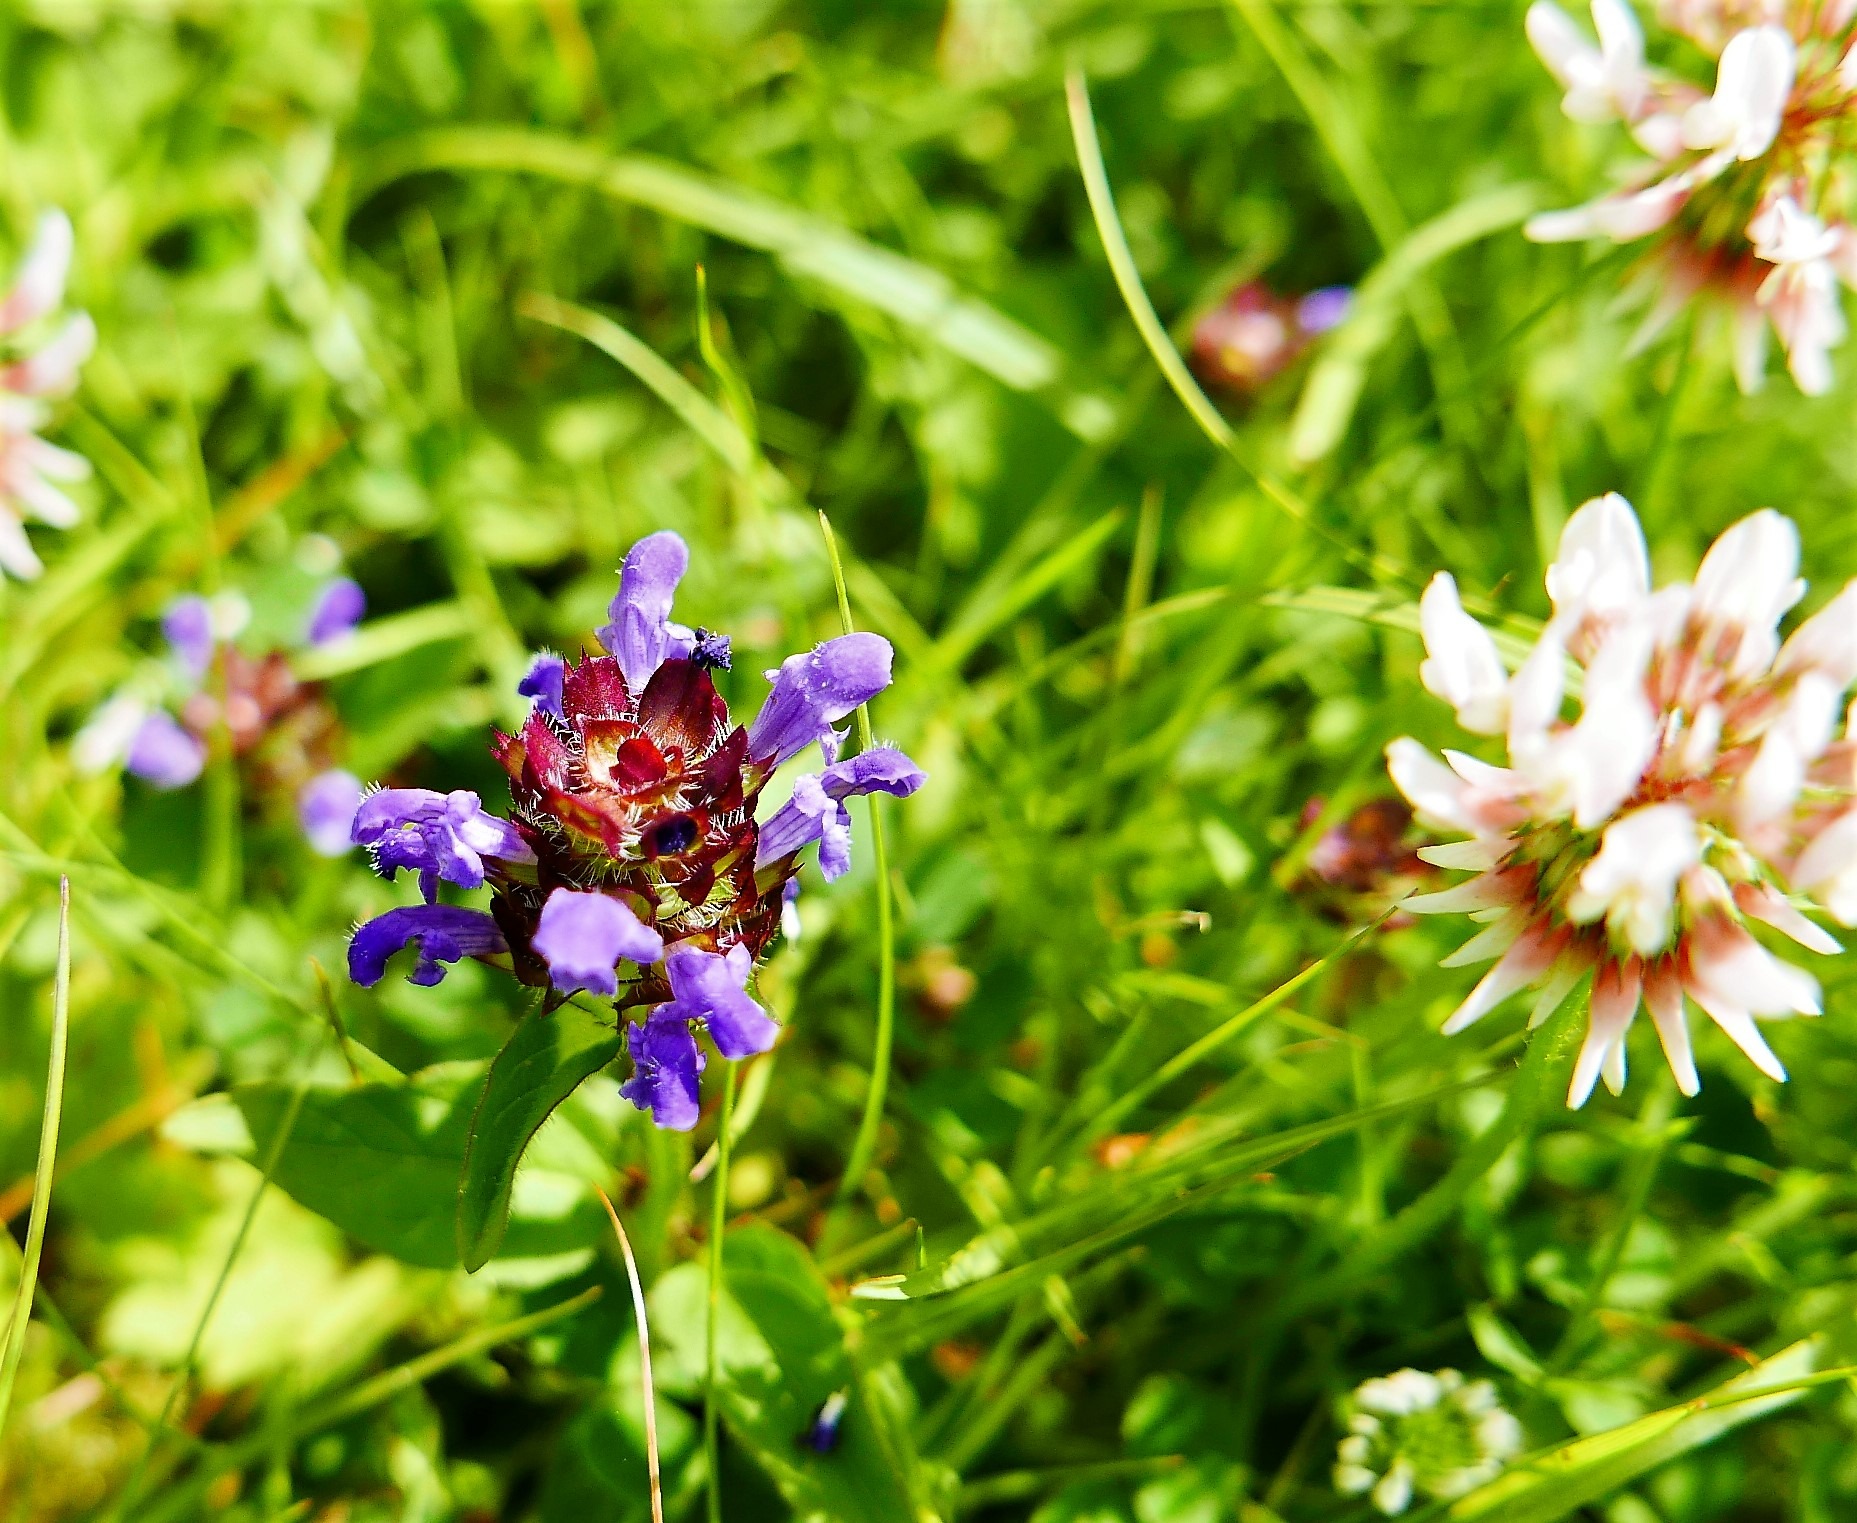
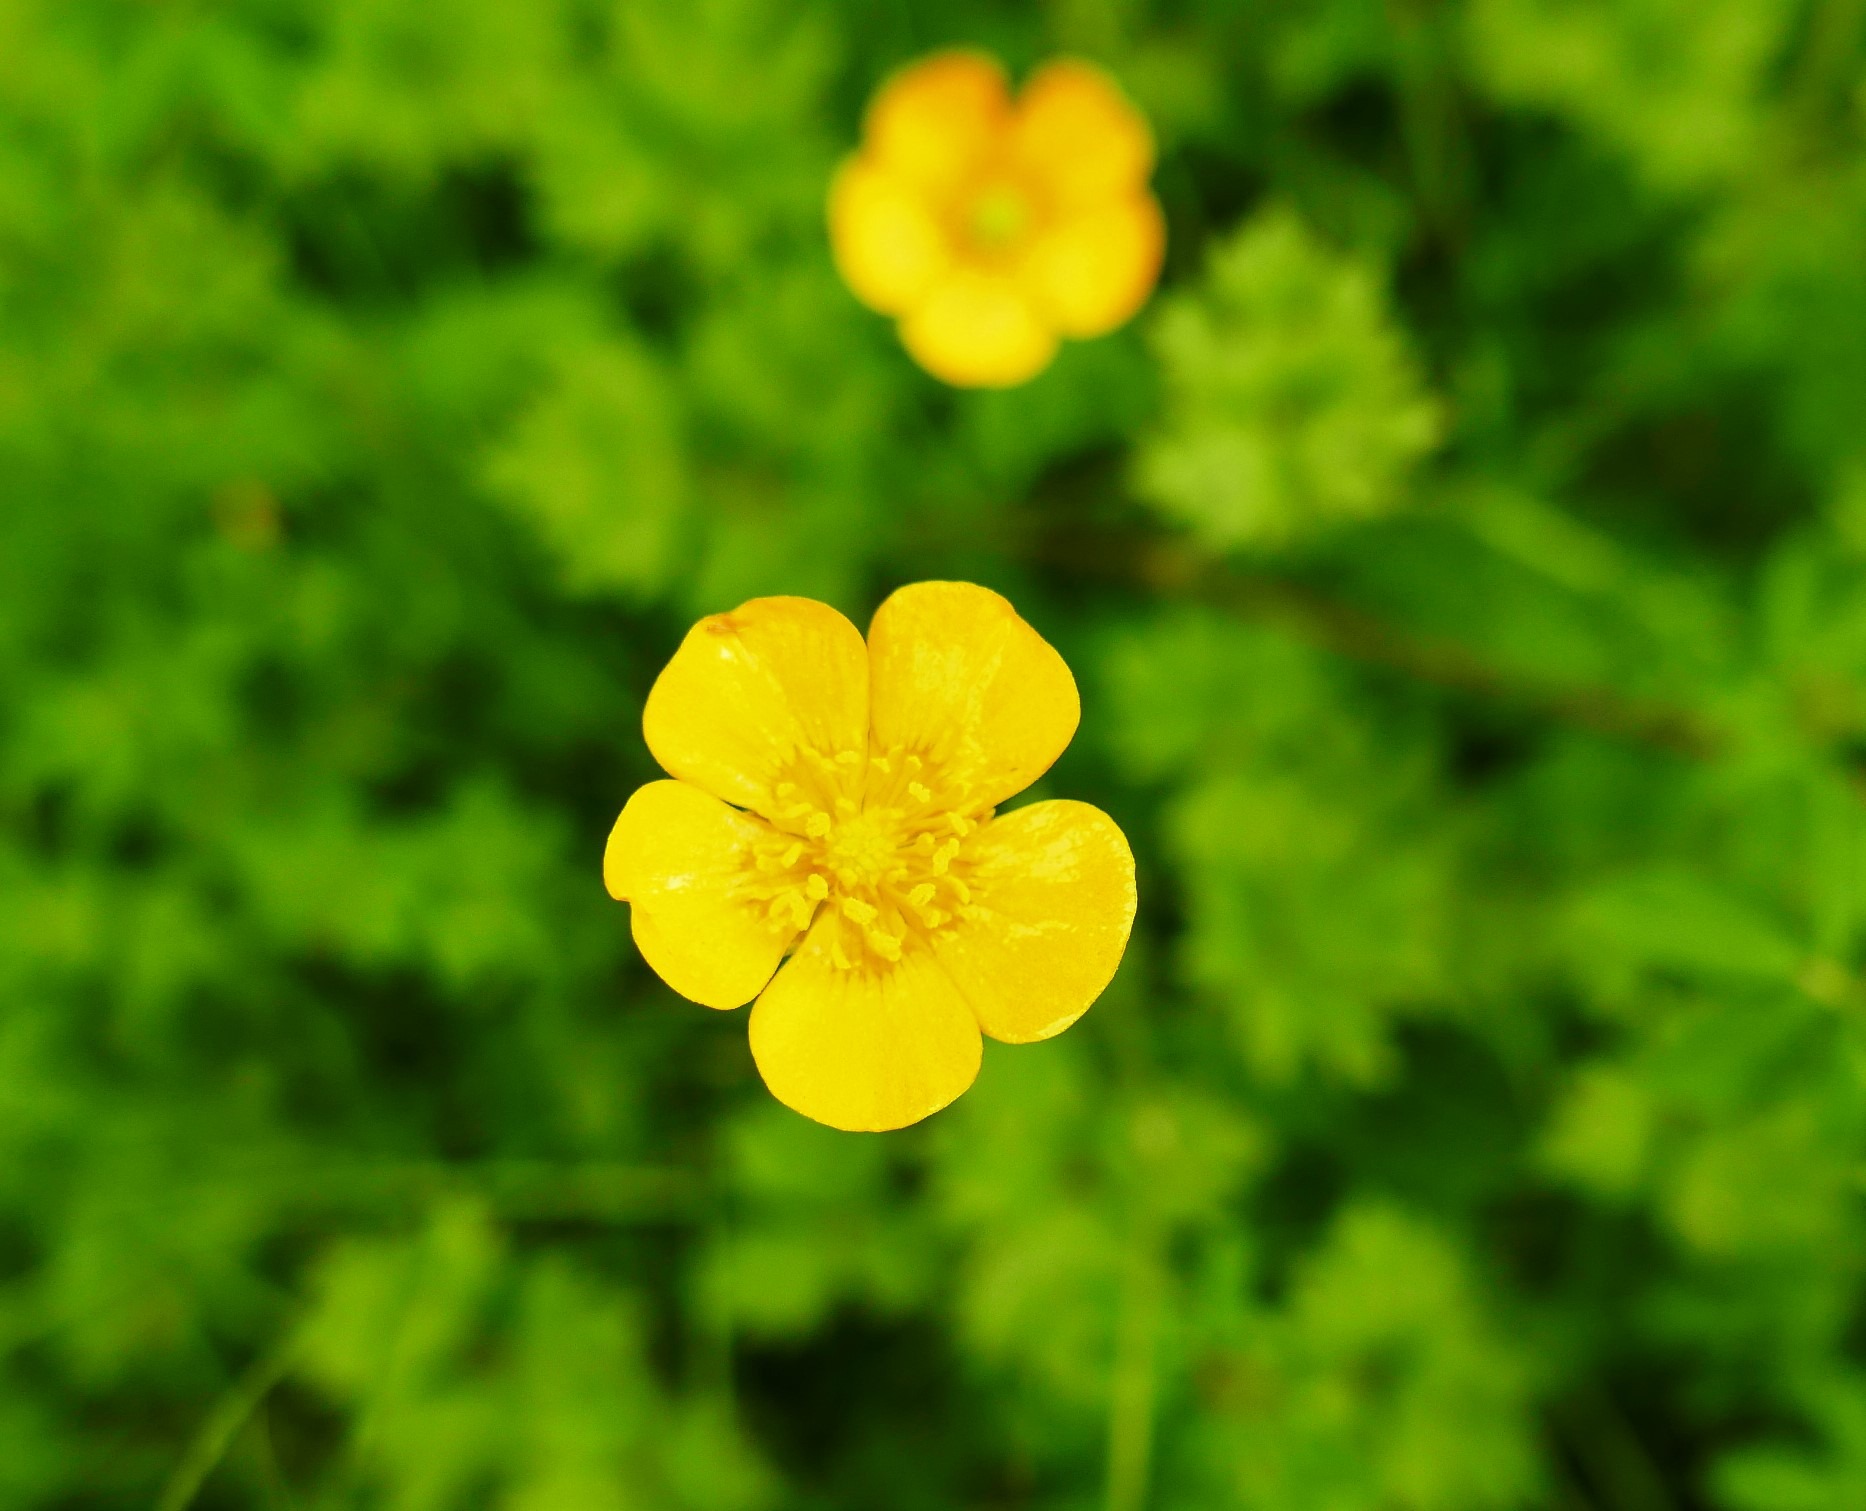
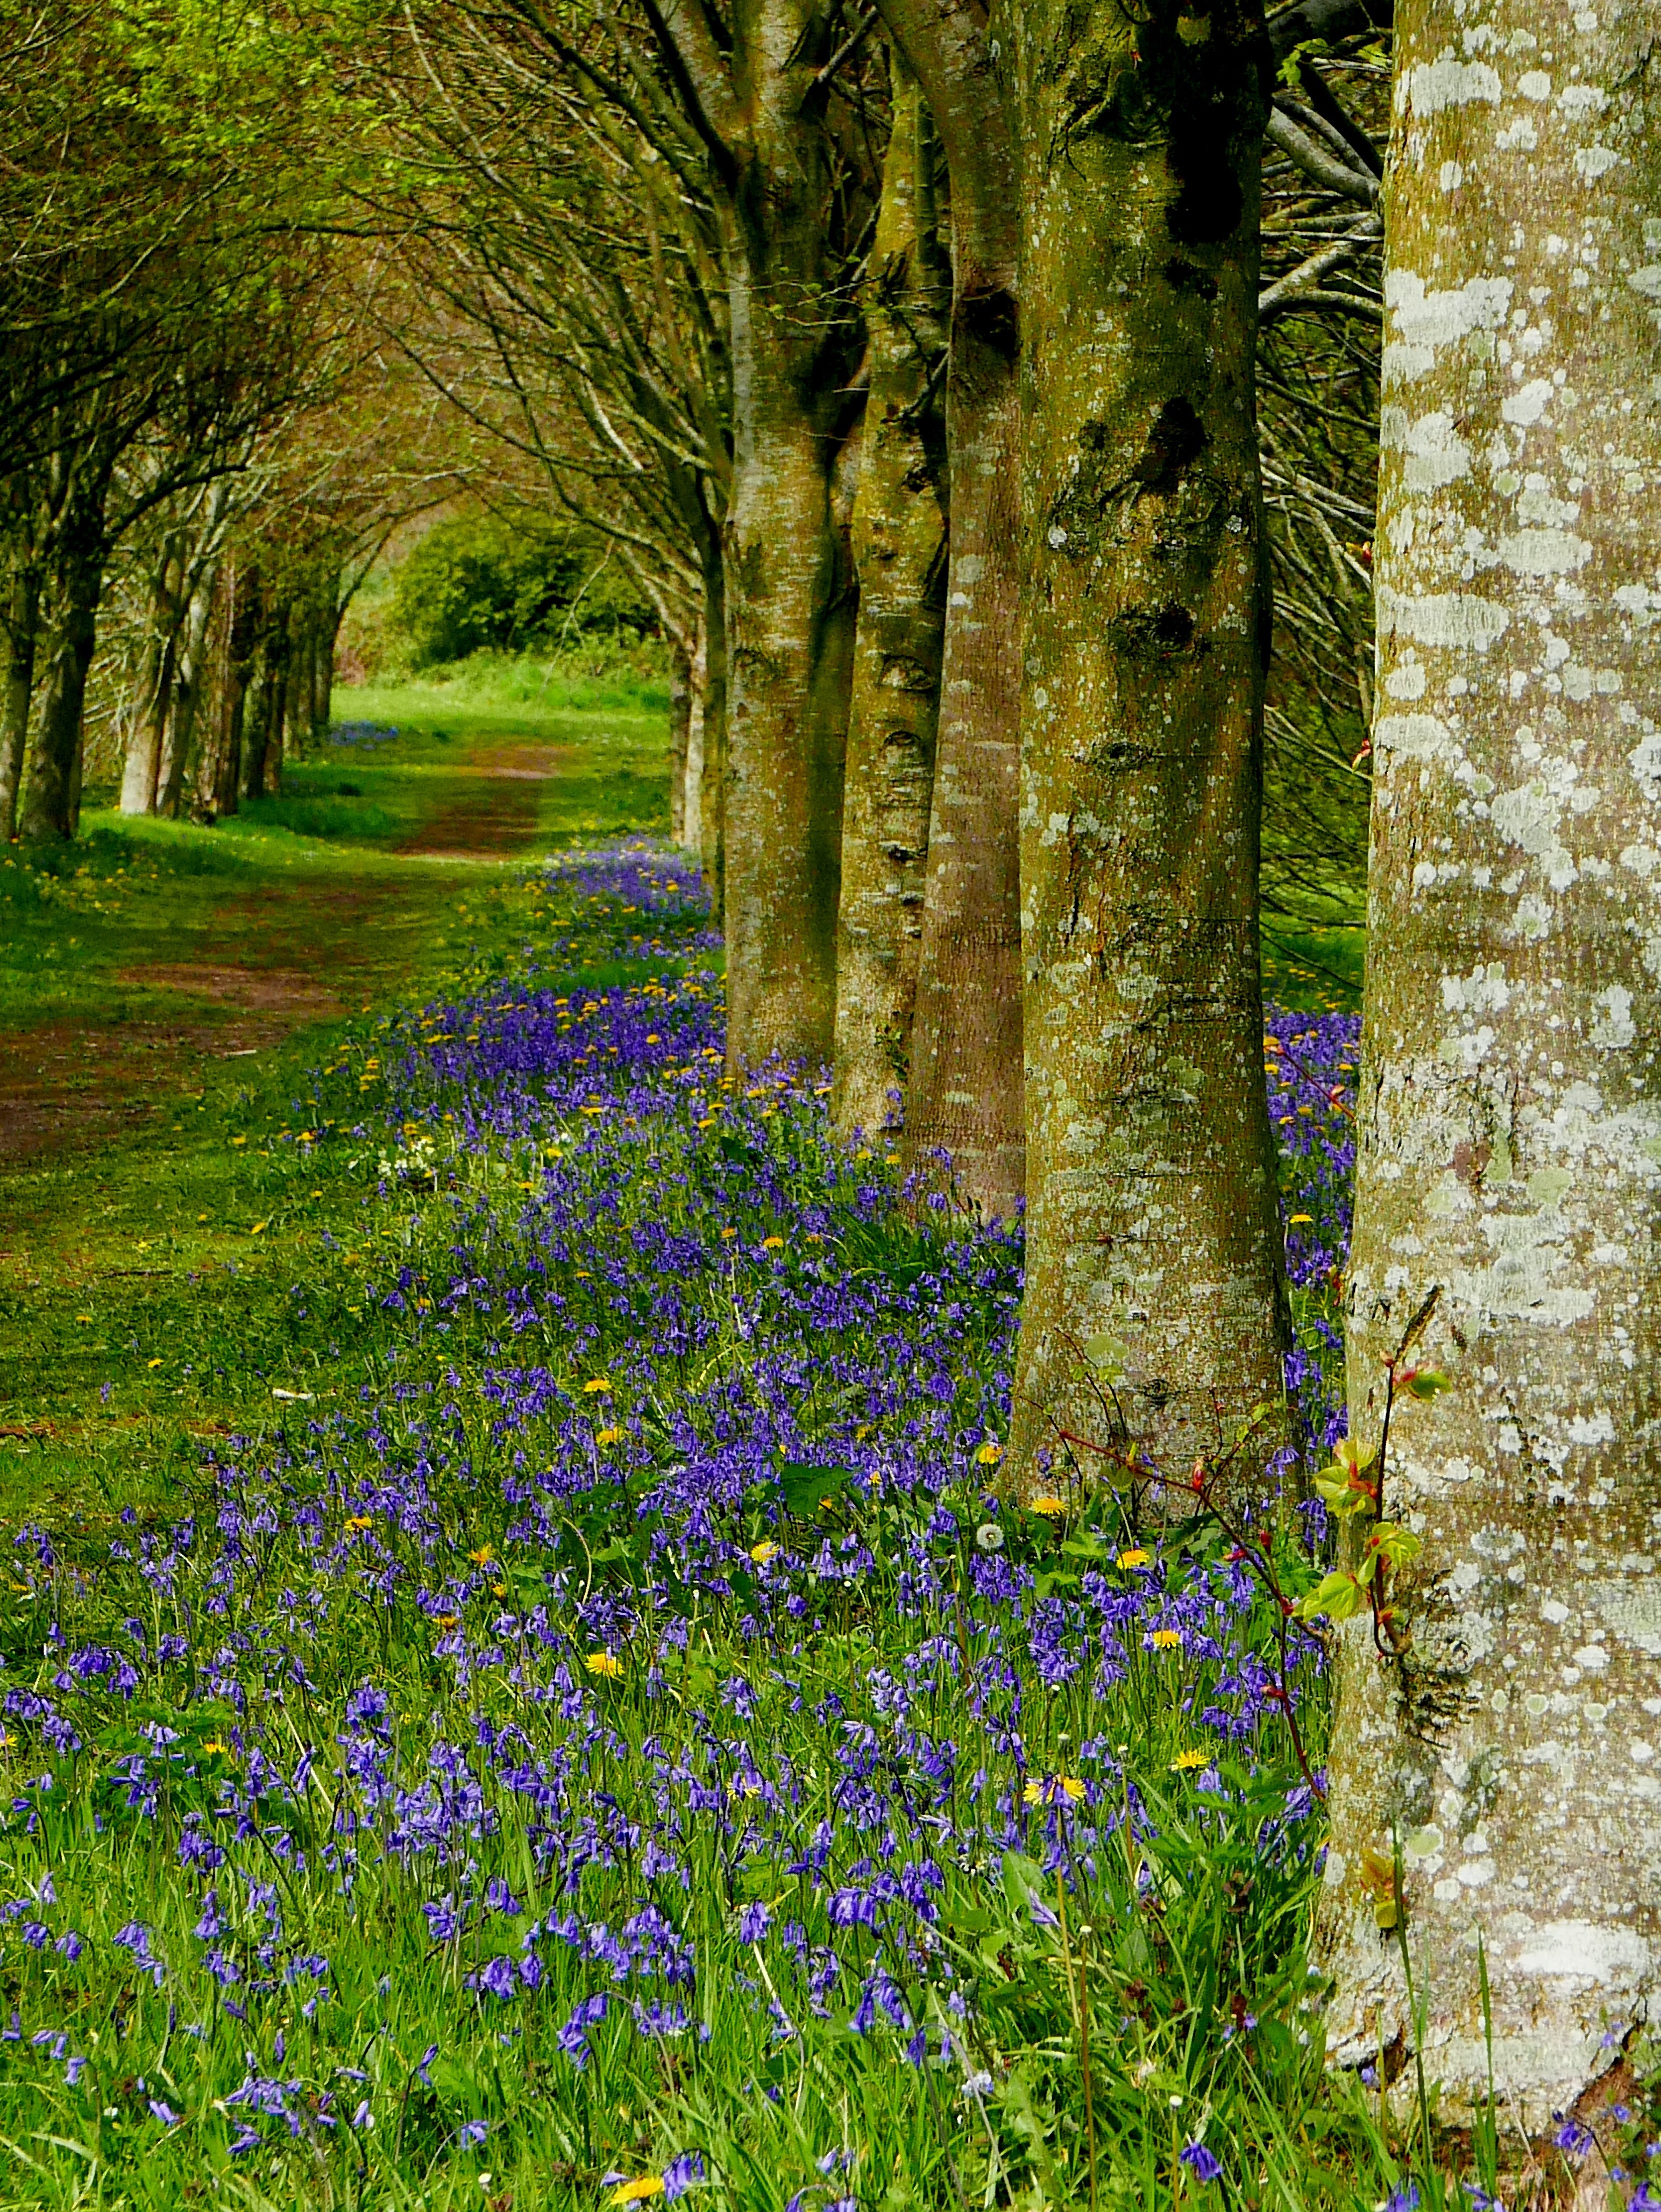
‘Hurrah’ we said, until this morning, when we wandered out into the jungle and discovered that it had become  home to hundreds of honey bees, wild orchids, clover, buttercups plus other stuff that we don’t know the name of..

June 25th back garden.. (6)June 25th back garden.. (5)June 25th back garden.. (1)

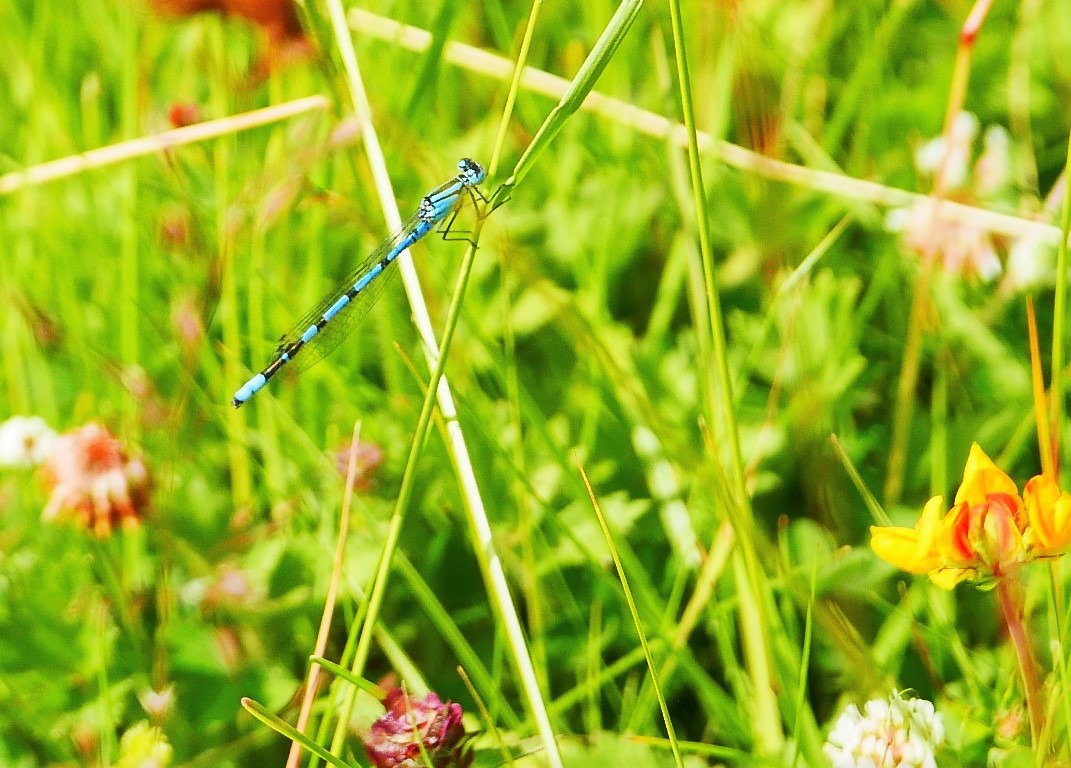
and, oh yes –  even the odd dragonfly..

June 25th back garden.. (8)

In a matter of weeks, our boring back garden had turned into WB Yeats’ ‘bee-loud glade’..

June 25th back garden.. (2)

A bee’s backside – you don’t see that every day ;)

We stood on the back step, gazing at the ferocious activity and came to a decision. We’d get the new guy to just strim the edges, cut a bit of the grass, and leave the wildlife to enjoy itself for another few months.

I have absolutely no doubt that he’ll think we’re complete eegits; especially since he’s been lent by my no-nonsense, professional-gardener-style sister-in-law.. but we’ll just have to suck up his contempt for the moment.. it will keep the bees happy..

June 25th back garden.. (4) June 25th back garden.. (3)

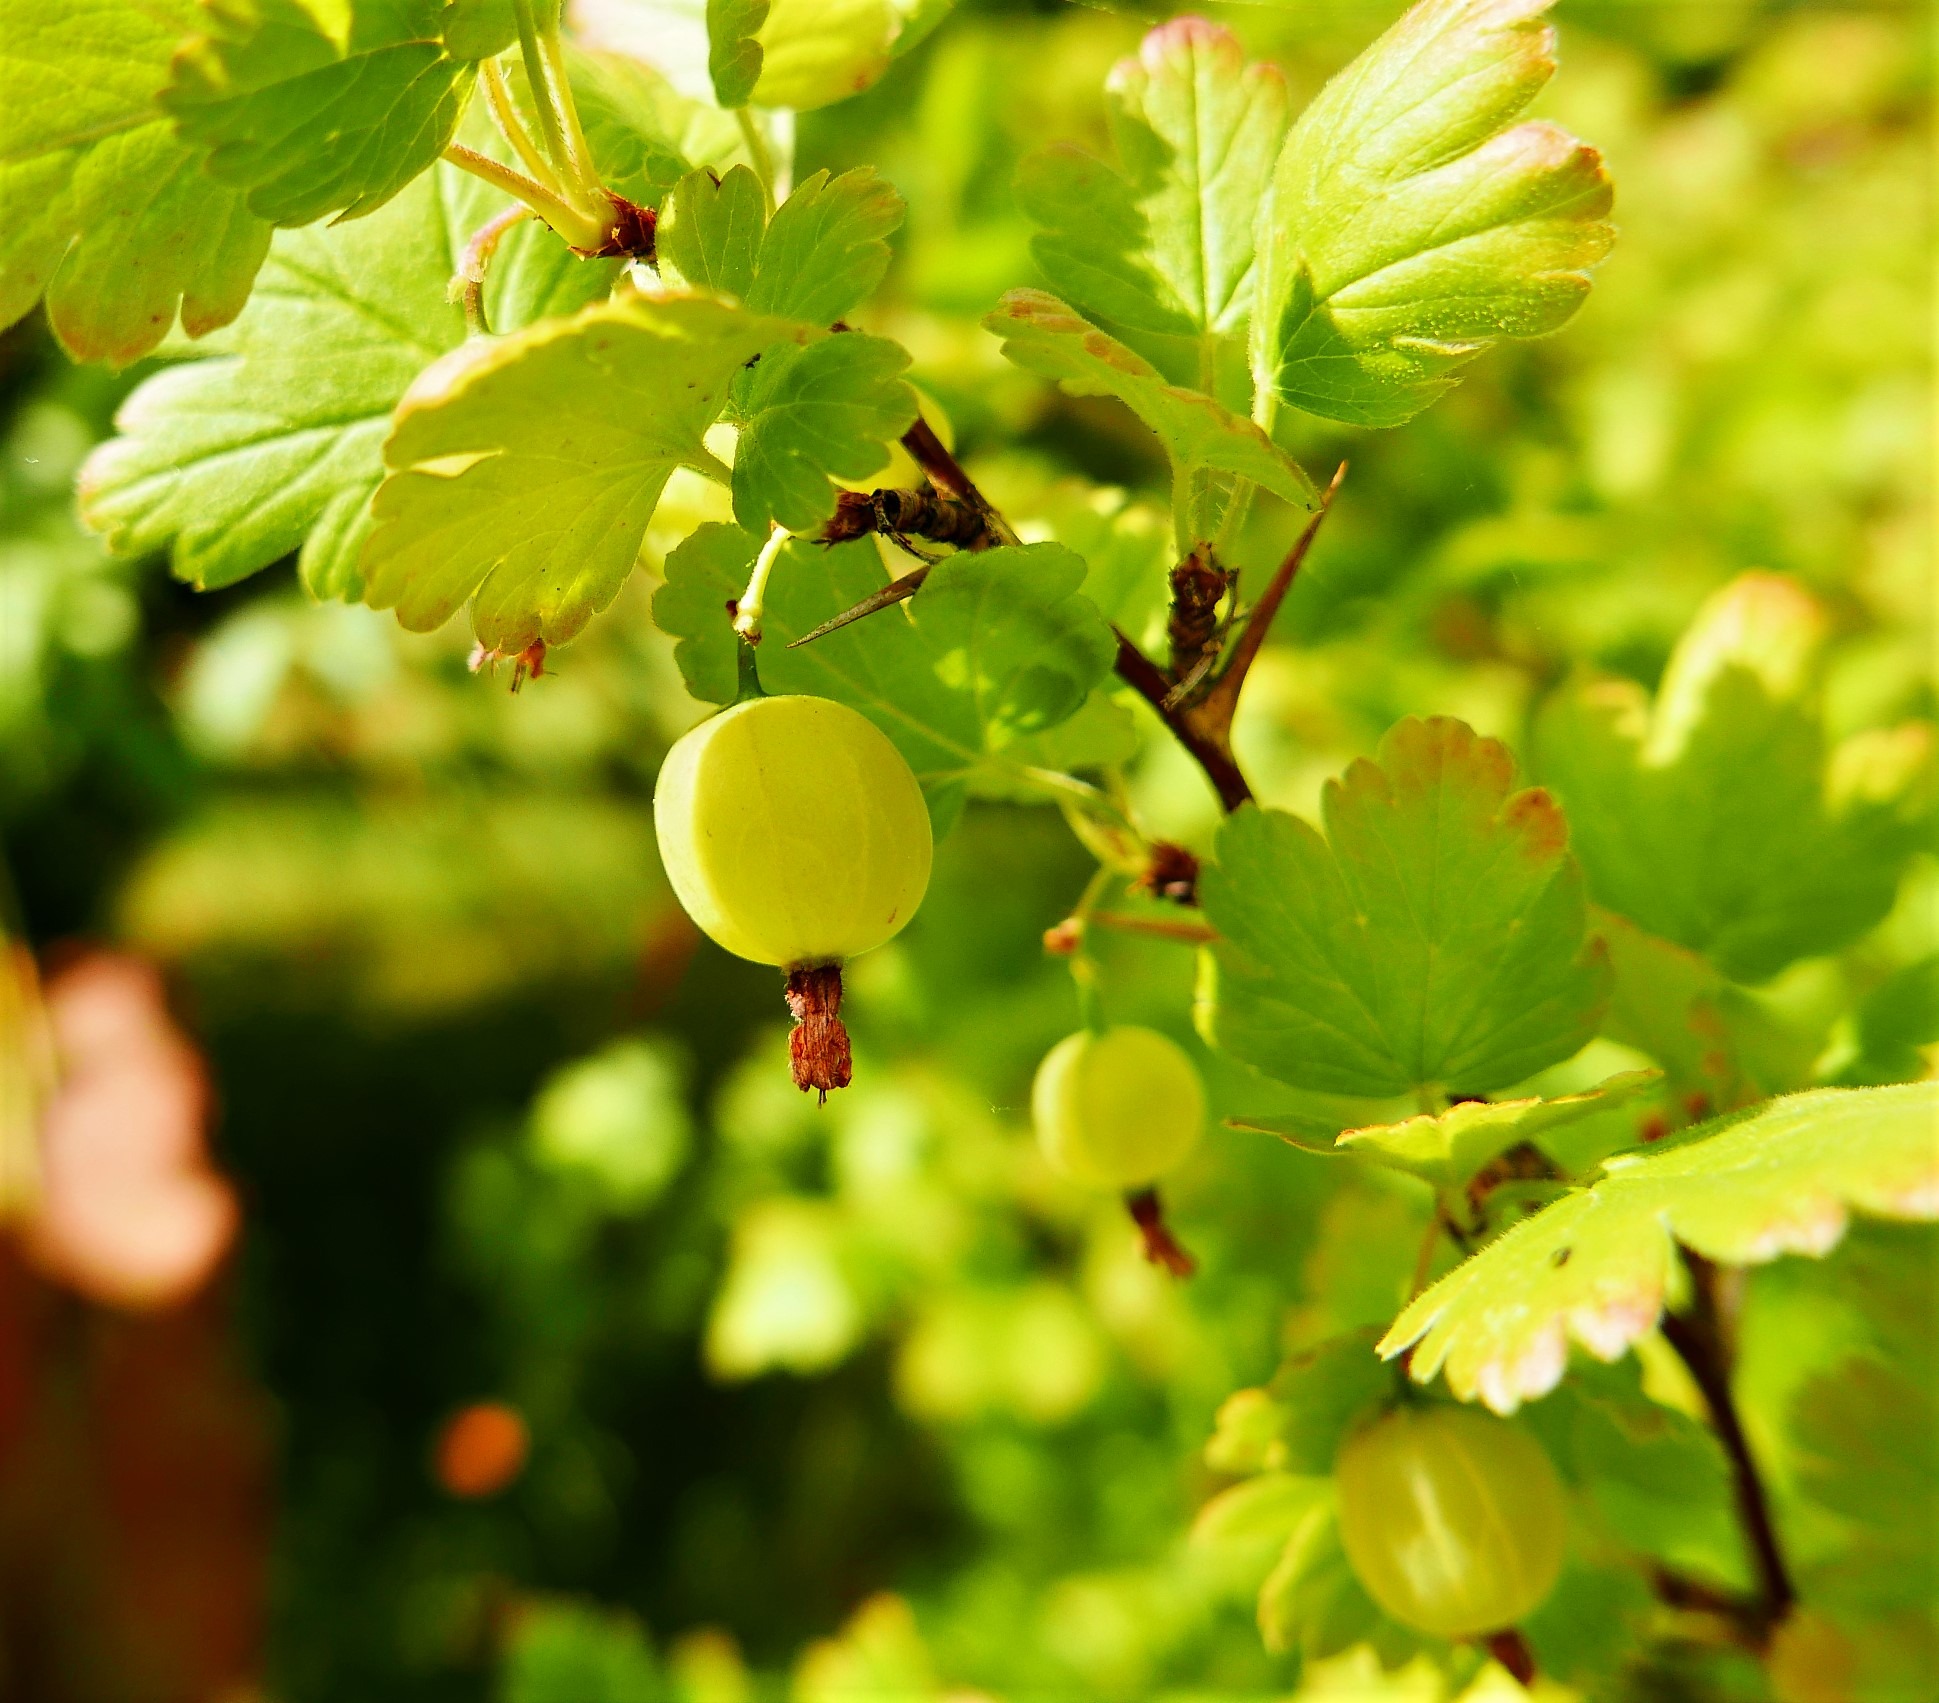
Our organic Blueberries and Gooseberries are coming along nicely too, by the way. No one bothers them out there you see.. 😉

Two days later:

We did as we planned and the kind man said nothing but cut what grass he could.

June 29th Home.. (3)

It’s no great shakes, but it does look a little tidier..

The following morning, Mr Sat Night said to me as I wandered into the kitchen – ‘We did the right thing with the garden’.

‘Did we?’ said I.

‘Yes, I’ve been watching the bees having a ball with the weeds..’

Job done.

And here’s a picture of Fluff enjoying our ‘bee-loud glade..’  :)

June 27th Back garden (2)

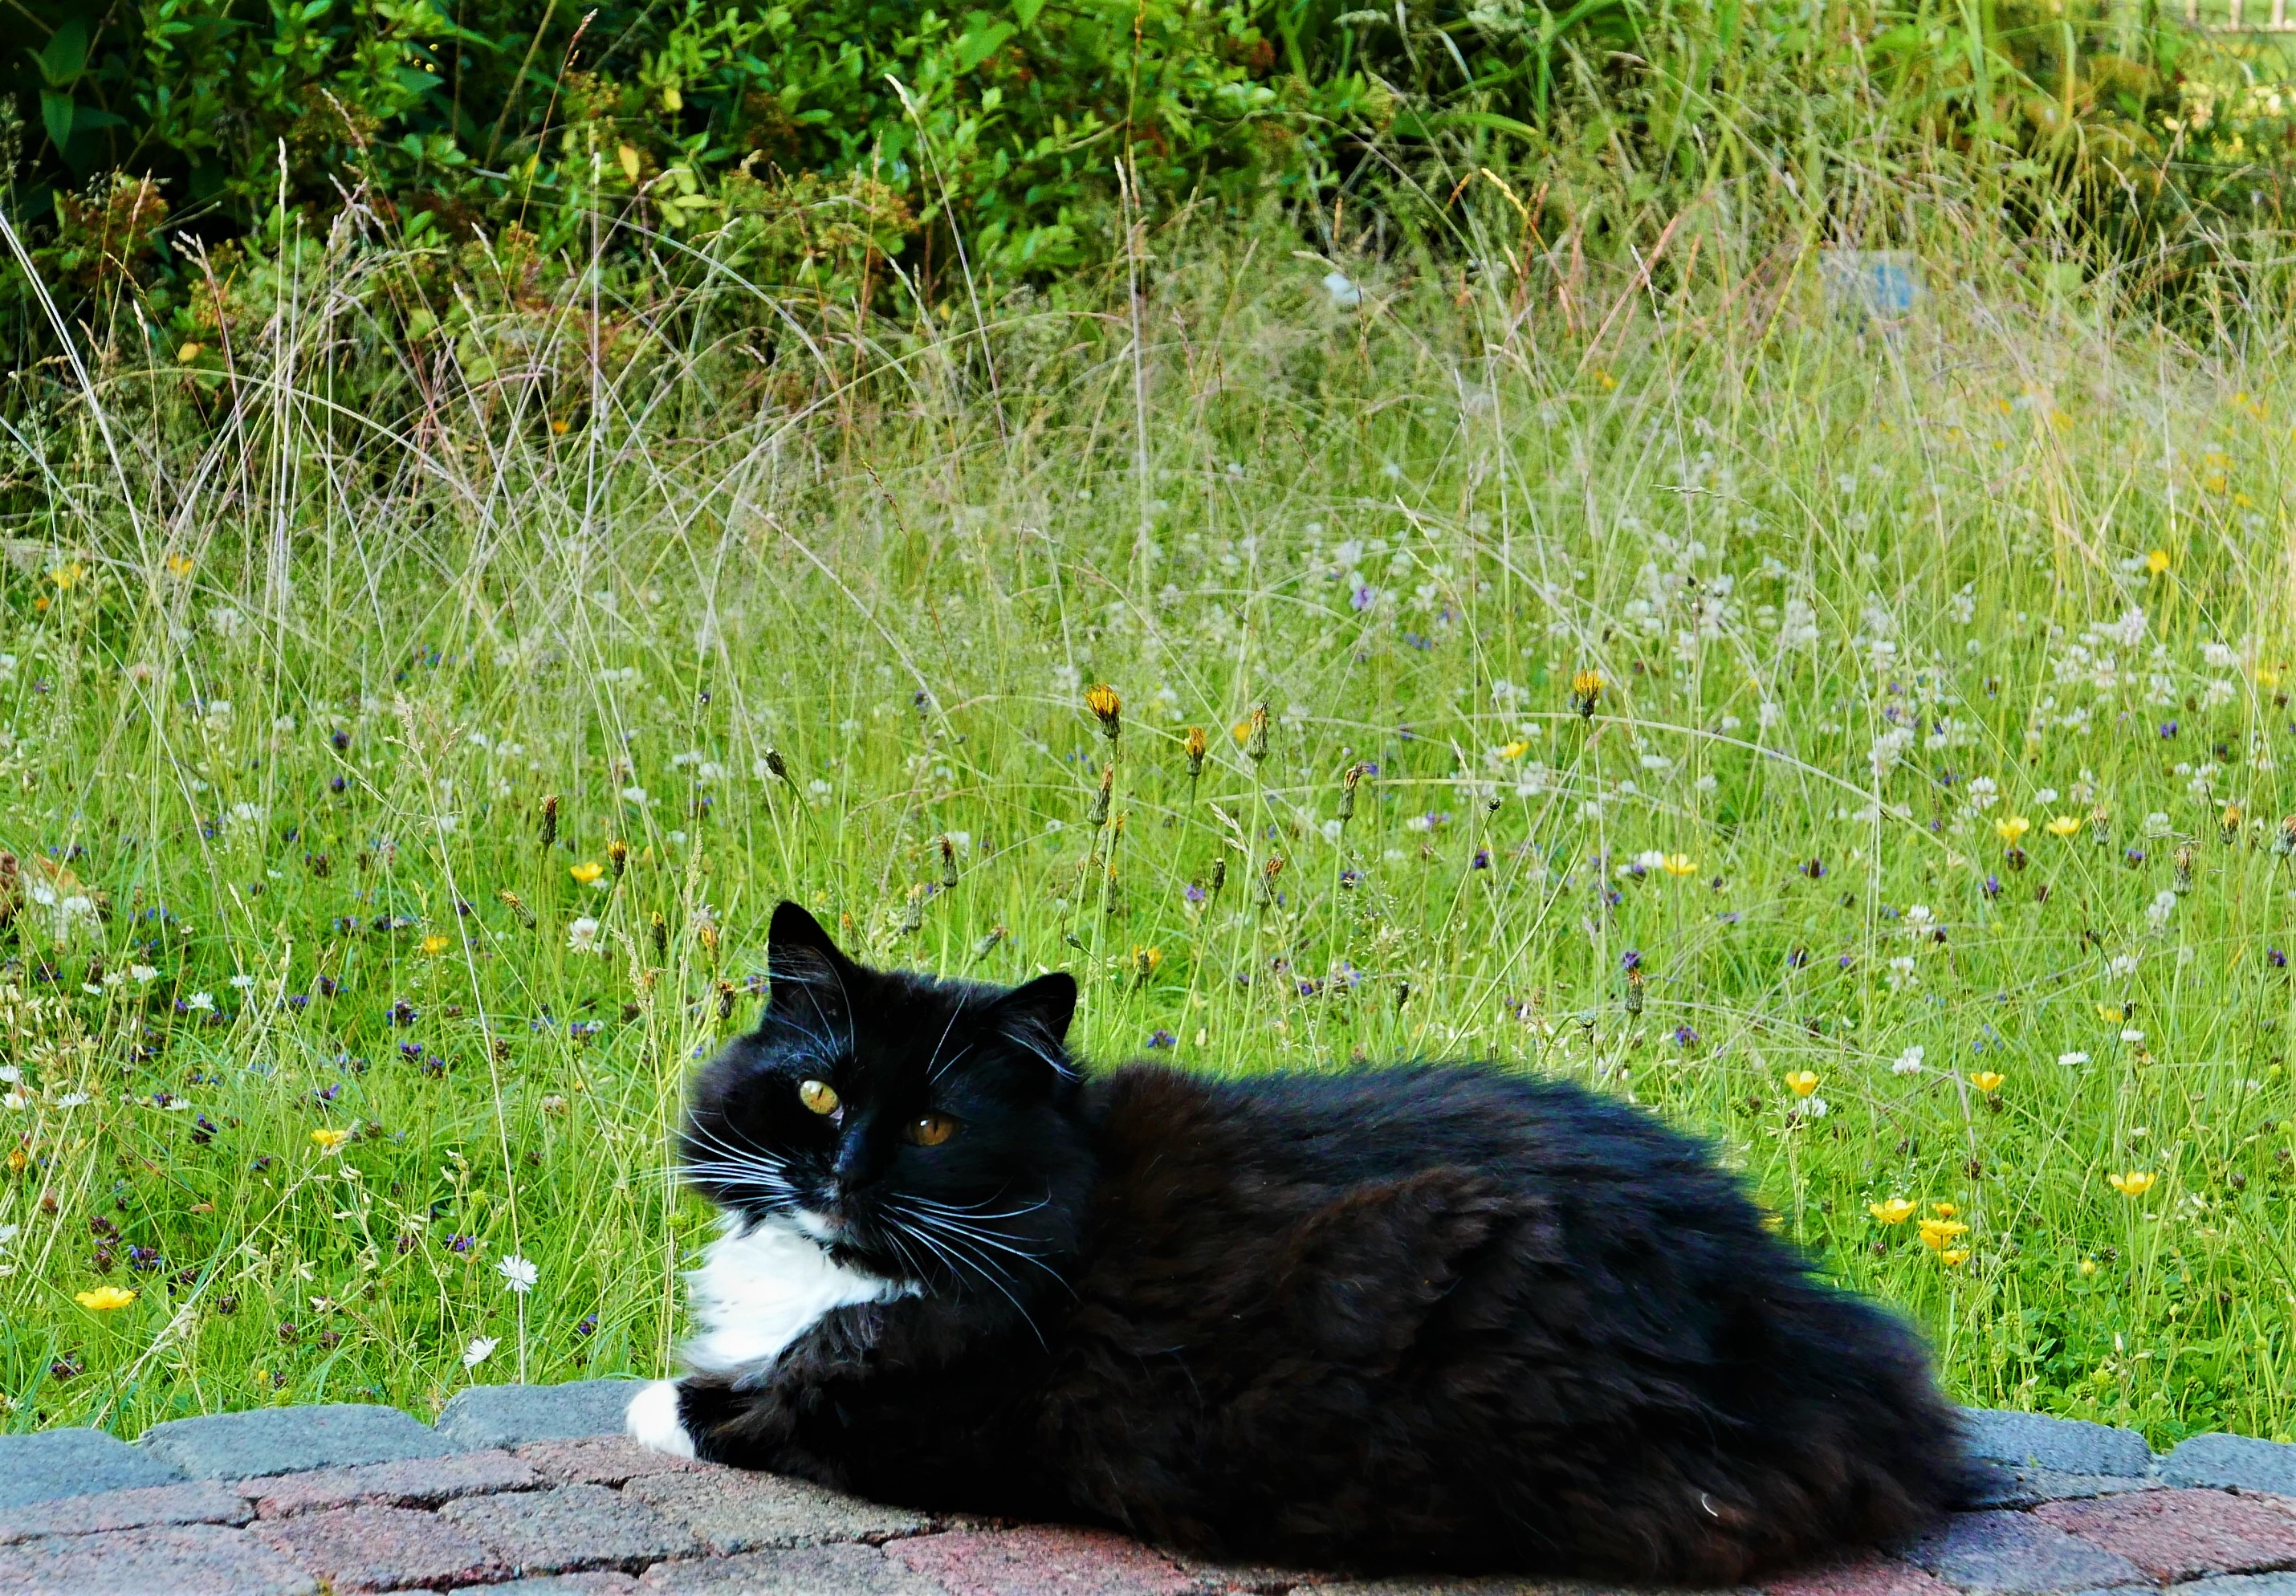
We’ve also put out a bowl of sugared water for the bees, in case they’re thirsty in this heat. Sadly I can’t guarantee that the cats haven’t slurped it up!

June 29th Home.. (8)

June 29th Home.. (7)

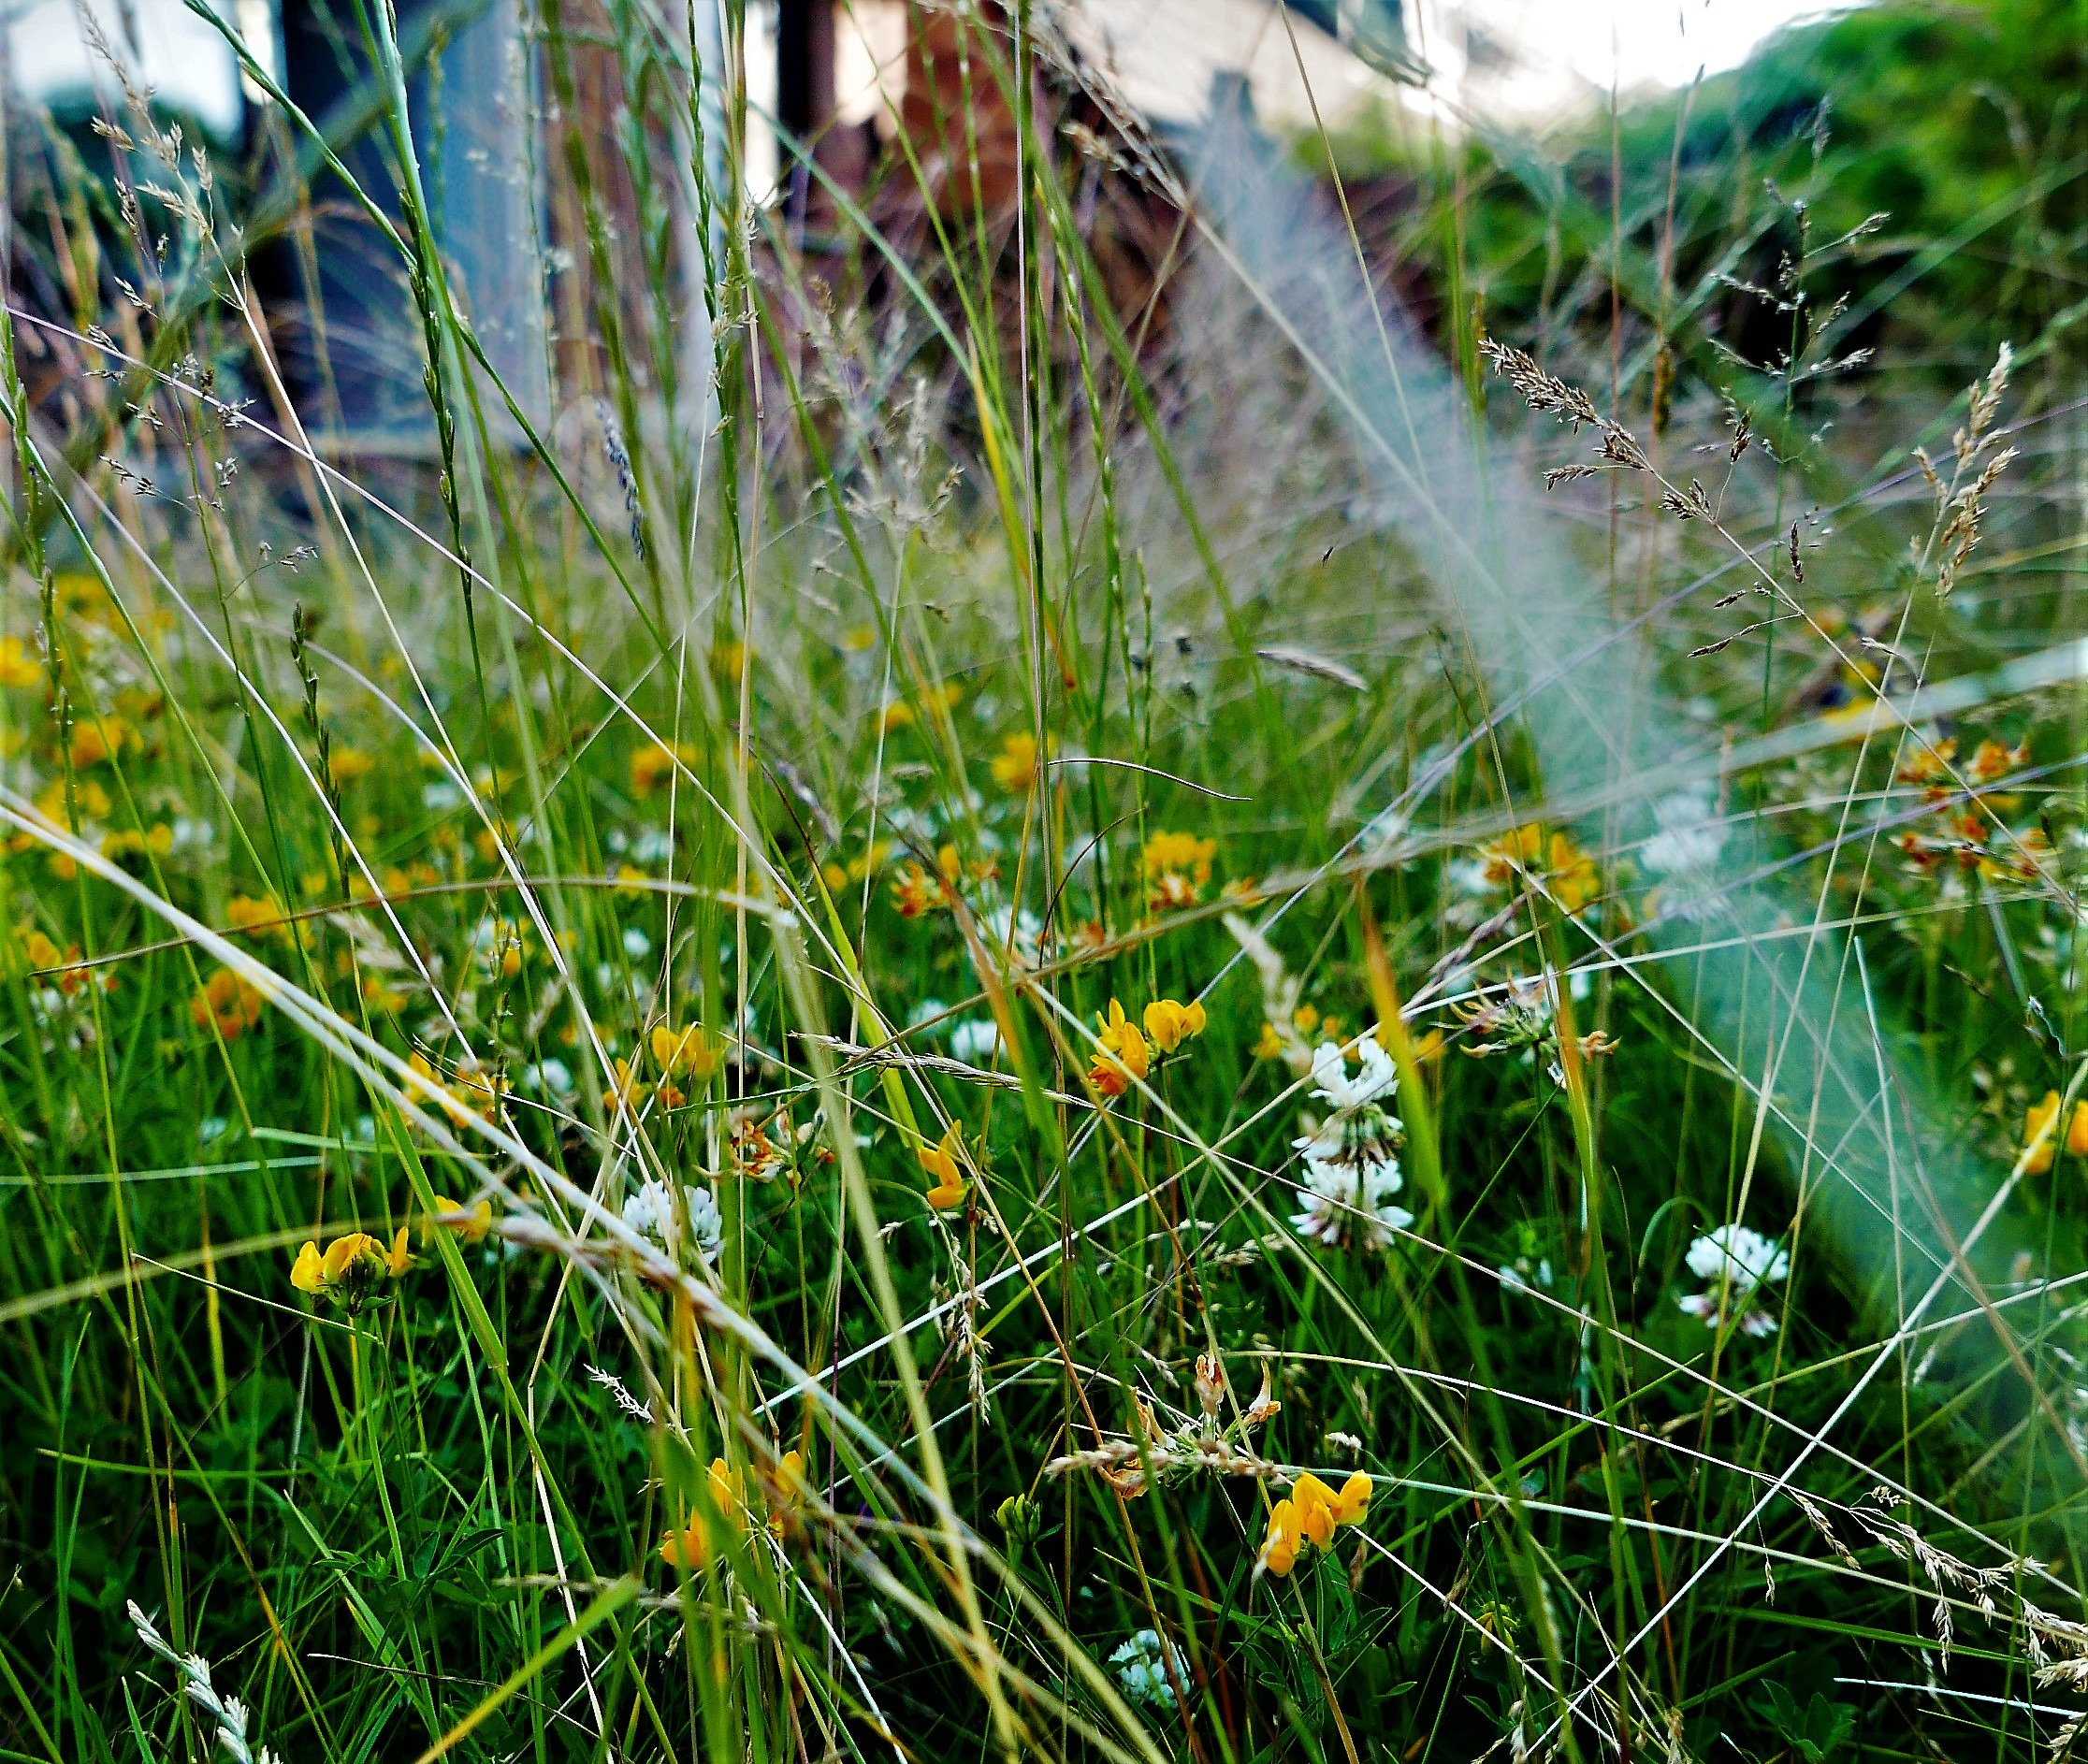
Evening light in the jungle..:)

Posted in Blog

Home-made Elderflower Cordial..

Eldeflower cordial (5)

Eldeflower cordial (5)

Being born only a few miles from Stephen’s Green meant that any sort of ‘country lore’, for want of a better word, has come to me late in life! Having said all that:  a) I loved living where we did in Dublin, and b) I’ve embraced every kind of foraged  and seasonal cooking since. Turns out it’s never too late to learn :)

The recipes for Sloe Gin  (https://eatingforireland.com/recipe/sloesall-you-need-to-know/ )  and Rhubarb Gin (https://eatingforireland.com/recipe/champagne-rhubarb-gin/ ) are good examples, but also my use of local and seasonal ingredients has hopefully encouraged you to make the most of our great range of local foods.

Today is a new adventure for me – I’ve never made Elderflower Cordial before so as usual, I’ll do the experimenting, so that you don’t have to!

Before you start – the most difficult bit of this recipe for me was actually sourcing the Citric Acid – I tried 3 chemist shops and a health-food store before I hit gold. So if you happen to be in your local chemist, ask if they have it and buy some – you need 85 g for the recipe below (I had to buy 2x 50 g boxes today). I’m pretty sure it doesn’t go off, so you could keep a little extra for homemade lemonade if you fancy it :)

This is a really easy recipe, and Elderflower Cordial is one of my favourite things, (https://eatingforireland.com/recipe/the-summery-lunchtime-drink/)   so if you can persuade some kind person (Thanks Liz!) to give you about 20 little flower-heads, then get cracking!

EQUIPMENT:

  • Your largest saucepan – a stock pot that holds about 10 litres is perfect
  • Sieve, +/- a colander
  • Kitchen paper, a clean thin tea towel, or a sheet of Muslin
  • Long-handled wooden or other spoon
  • Potato peeler
  • Weighing scales
  • Measuring jug
  • Large bowl (to strain the cordial into)
  • Glass bottles, sterilised and sealable (see NOTES)

THIS RECIPE MAKES ABOUT 4 LITRES

INGREDIENTS:

  • 2.5 Kg of sugar (granulated or caster – doesn’t matter which) Elderflower Cordial 2018 (3)
  • 85 g Citric Acid (see pic)
  • 1.5 litres of cold water
  • 20-25 heads of Elder Flowers
  • 2 large unwaxed lemons


METHOD:

  • Put the sugar and water into the pot.
  • Heat it relatively gently until the sugar dissolves, stirring every so often.
  • Using the potato peeler, peel strips of the lemon zest from each lemon, then cut each one into 1cm slices.

Elderflower Cordial 2018 (12)

  • Fill a bowl with cold water and wash the flowers gently (I did this by holding them by the stalks and swishing them through the water) then drain in a sieve lined with kitchen paper.
  • Using a sharp scissors, cut any long bits of stalk off at this stage.

Elderflower Cordial 2018 (11)

  • When the sugar has completely dissolved (check for grains on the back of the spoon), turn up the heat and bring the solution to the boil.
  • As soon as it boils, turn off the heat, then add the Elder Flowers, lemons, lemon zest and citric acid. Stir it all in well.

Elderflower Cordial 2018 (19) Elderflower Cordial 2018 (21)

  • Then cover the pot, and leave it in a cool spot for 24 hours to infuse.
  • After the 24 hours (which seemed endless to me!), start off by placing the sieve over a suitable container, then add a double layer of kitchen paper and ladle the liquid through, leaving most of the flowers and lemons behind at this stage.

Eldeflower cordial (7) Eldeflower cordial (6)

  • When you’ve used up most of the clear liquid, line a colander with a thin tea towel, then carefully transfer the remaining contents of the pot into it.

Eldeflower cordial (2)

  • Allow the last of the cordial to filter through and then, if you’re like me, gather up each corner of the tea towel and give it all a really good, tight, squeeze to get every last drop out..(you did all that work – you should have all of the cordial to show for it!)
  • Discard the dried-out flowers and lemons.
  • Using a jug with a good pouring spout, fill up your bottles, then seal and label.
Eldeflower cordial (1)

Liquid Sunshine!

  • Your cordial is ready to drink now, and will keep for about 6 weeks in a dark, cool spot or fridge. See NOTES.

NOTES:

  • My friend Janet suggests freezing some in plastic bottles for later on in the year. If you’re doing that, make sure you don’t over-fill the bottles as the cordial will expand as it freezes.
  • To sterilise your bottles, either boil them in a large saucepan, or put them through the dishwasher. Then dry them in a cool oven at 120 degrees.
  • The transfer of the cordial into the bottles can be a little sticky, so may I suggest that you do as I did, and keep it all either in, or very close to, the kitchen sink! I used a damp cloth to wipe the bottles once they were sealed as well, to remove any last stickiness..
  • I really enjoyed making this Elderflower Cordial, and I’ve got about 4 litres to show for my efforts. I’m putting a litre into the freezer, as Janet suggested above, for a rainy day :)
  • Don’t forget to try my Cocktail Hugo, which has Elderflower Cordial as an ingredient! https://eatingforireland.com/recipe/cocktail-hugo/

Eldeflower cordial (3)

Posted in Latest Recipe, recipes Tagged with: , , , ,

The Miranda! :)

Summery drink (2)

pimms


A flying visit from a dear friend, who took time out from her busy Mother-of-the-Bride duties to have lunch with us today was amused when I photographed her drink.. Mr Saturday Night merely rolled his eyes and assured her that she’d get used to it, as he had!

As some of you may know, I am a big fan of a Dressed Pimms  https://eatingforireland.com/recipe/dressed-pimms/ , especially on a sunny May afternoon, but this MOTB had places to be, so I checked the cupboards to rustle up a non-alcoholic version. That bottle of Elderflower Cordial came into its own today.. I must say that I really enjoyed it.. This will keep your non-drinkers/designated drivers happy at your weekend festivities..

EQUIPMENT:

  • A big jug, a pretty one if you have it..
  • A wooden or other spoon for stirring
  • To Serve: Big balloon glasses (the sort used for G+T’s these days) or large red wine glasses, or tumblers..

INGREDIENTS: To make one 1.5 litre jug

  • 100mls Elderflower Cordial (I used Belvoir Farms)
  • 6 strawberries, sliced into 3-4
  • about 15cms of Cucumber, cut down the middle, seeds removed and one half cut into half-moons, the other cut into thin lengths
  • Half a crunchy apple, cut into thin wedges
  • 1 lemon, cut in half, seeds removed and sliced into half-moons
  • Big handful of fresh mint
  • a good-sized bowl of ice
  • Sparkling water to top it all off


METHOD:

  • Pour the Elderflower cordial into the jug
  • Add the fruit and cucumber

pimms prep

  • Top up with Sparkling water until the jug is about 2/3rds full
  • Add the mint.
  • Give it all a good stir, then put into the fridge for about an hour to let the flavours mingle
  • When you’re ready to serve, give it another stir, throw in the ice, and top up with the rest of the sparkling water
  • Have a taste to make sure you can taste the elderflower, then stir once more, and serve..Summery drink (2)

NOTES:

  • It’s worth starting this off an hour before you need it, so that the fruit and cucumber has time to mingle.
  • You can easily double this recipe for parties.
  • To top up an existing jug- add 80mls Elderflower, and sparkling water, then taste before adding ice. Leave the fruit that’s in the jug there, possibly added a few more strawberries if people have been eating the last ones!

Summery drink (3)


Posted in Latest Recipe

What a difference a week makes :)

28th May bank Holiday Monday front garden (3)

A week away at a beautiful wedding in Sicily reminded me how quickly things can change in the garden back home..

20th and 21st May 2018 (17) 20th and 21st May 2018 (23) - Copy


After a hectic, but oh-so-enjoyable, week in Taormina with friends, we arrived home so late last night that dawn had broken as we drove up from the airport, and it was fully daylight when we finally dragged our weary bones into bed.

A gentle, meandering day was required as part of our recuperation – so a stroll into town along the river; some coffee, and a take-away salad lunch brought us home to sit and wander in the garden.

28th May bank Holiday Monday front garden (3)

The front garden which faces south, and gets all the attention, was becoming its usual lush summery self. The Laburnum will soon be in full yellowy bloom. The maples have put on their magenta coats, and the weeds are making their presence felt – after a few half-hearted pulls at some of them, we decided that it was a job for another day!

The Fluffster

The Fluffster, glad to have us home :)

The north-facing back garden offered even more excitement. The gooseberries are certainly on their way. If I don’t pick them quickly as they ripen, we have some very fat pigeons who’ll do it for me!

May 23rd, home from holidays (15)

And the blueberries are coming along nicely too – Is it totally unacceptable to think of my habit of freezing some of our own blueberries for our special Christmas Morning Blueberry Pancakes? Yes? Oh, ok..

May 23rd, home from holidays (17)

I know they’re green, not blue, at the moment, but it’s only a matter of time..

Our lovely old Hawthorne tree (growing in our garden long before we moved here) was in it’s full, scented glory, after its rather worrying failure to flower last year. My policy of talking to it, and being nice to the Fairies has obviously worked! In Ireland, Hawthorns are known as Fairy Trees, so I’ve been very careful over the years to ensure that no harm comes to it.

May 24th 2018 back garden (1) May 23rd, home from holidays (14)

Only a week’s absence has also changed the character of the weeds in the garden – the Dandelions all now sport their beautiful feathery heads.

May 23rd, home from holidays (19)

As children we used to blow at the dandelions to see how few puffs could empty the head! And the little daisies kept us occupied for hours as we made crowns, necklaces and bracelets from daisy chains, so it’s hard not to be sentimental about these old garden perennials.

May 24th 2018 back garden (3)


In the absence of our lovely Roy, who normally keeps our garden in check at this time of year, I’ve been learning to love all the wild flowers which appear to have popped up in the week we were away..

May 24th 2018 back garden (6) May 24th 2018 back garden (4) May 24th 2018 back garden (7)

Apart from the Buttercups, I have no idea what the others are called!

Answers on a postcard please.. :)

Some people would be ashamed of my weedy garden, but I’m not! As my Mum always said ‘a weed is just a flower growing in the wrong place’ – Thanks Mam :)

Have a good gardening week :) xx


Posted in Blog Tagged with: , , , , ,

The Cheat’s Beef Stroganoff

Beef strog (2)
Beef strog (1)

Just waiting for the Crème Fraiche to melt in…

I love Beef Stroganoff – that smoky, creamy sauce with beef, mushrooms and onions. But truly, it’s a complete pain to make the real thing. I once spent a small fortune on fillet steak, to create the real deal, but it was a disaster. This is where my cheat’s version comes in – this has all the flavours, and just needs a splash of brandy and some crème fraiche at the end to elevate it to dinner-party worthy.

Does that sound like I’m blowing my own trumpet rather loudly? Perhaps I am, but the only way you’ll find out if it’s justified is to try this recipe and see! If you’d prefer a vegetarian version, have a look at the NOTES at the bottom of the recipe.

EQUIPMENT:

  • A deep frying pan
  • an oven-proof casserole.

INGREDIENTS:

  • 500g good quality beef pieces, all visible fat removed
  • A tablespoonful of Rapeseed oil, or some low-fat spray if you prefer.
  • 2 large onions, roughly chopped stew (1)
  • About 300g mushrooms – I use baby Portobello – sliced
  • 20g dried Porcini, soaked in 200mls boiling water
  • Half a red chilli, finely chopped
  • 2-3 cloves of garlic, crushed
  • good splash of red wine
  • 1 beef stock cube, crumbed
  • 2 heaped teaspoons of Sundried tomato paste
  • 1 heaped teaspoon of Smoked Paprika
  • Brandy (optional)
  • Crème fraiche
  • Fine chopped parsley (optional)

METHOD:

  • Heat the oil/spray in the pan on a high heat
  • throw on the beef pieces and let them sizzle and char a little.(5-10 minutes)
  • Then reduce the heat a little and add the onions and mushrooms. and let them soften a little (5 minutes)

Beef stroganoff (1)

  • Add the garlic and chilli,

Add the drained Porcini mushroom and a little of the soaking liquid – don’t use all the liquid as it may have grit in it from the mushrooms.

Beef stroganoff (2)

These is what the dried Porcini mushrooms look like in the packet..

Beef stroganoff (3)

The Porcini rehydrate so quickly in the hot water..


  • then pour over the wine; let it bubble up and reduce a little.
  • add the sun-dried tomato paste

Beef stroganoff (5)

  • Add the Smoked paprika and stir in.
  • Season with salt and freshly ground black pepper.
  • Transfer the lot to the casserole, cover and put into a med-cool oven – about 120 Fan or the equivalent.
  • Leave it there for a couple of hours until the beef is tender. Check a couple of times to make sure it’s not drying out – if it looks dry add a cup of cold water
Beef strog (2)

This what it looked like after an hour’s cooking –  I added a cup of water to make sure there was enough liquid.


  • Once the beef is tender, it’s ready to eat. As usual, it tastes better the next day, just requiring re-heating when you’re ready, making it the perfect main course. if you are letting it sit overnight  – stir in the brandy at this stage.
  • TO SERVE: Add a tablespoonful of Brandy and two tablespoonfuls of Crème Fraiche, and mix in. The sauce becomes a beautiful café-au-lait colour.
  • Sprinkle some finely chopped parsley before serving

beef strog

NOTES:

  • Vegetarian version: I made this for my vegetarian sister-in-law and niece, and they absolutely loved it. I followed the recipe exactly, apart from the beef and the stock cube. I used a lovely ‘Special Selection’ of mixed mushrooms from the supermarket. Obviously this won’t need as much cooking, so make sure the onions and Portobello mushrooms  are well softened before adding the ‘Special’ mushrooms. You can actually make and finish this version on the hob, without using the oven at all.
  • You’ll notice that I don’t add any extra liquid when I’m putting the dish into the oven – this is because mushrooms can release quite a lot of liquid as they cook –  just keep and eye on it, and add the cup of water if you think it needs it.
  • The smoked Paprika is essential for this recipe. It’s widely available in supermarkets.
  • This sounds like quite a time-consuming recipe, but I find you have time between the various steps to prepare the next one – so while the beef is sealing, I cut up the onions and mushrooms. While they’re softening, I chop the chilli and crush the garlic etc. In this way, it actually takes very little time to get it put together and into the oven.
  • As Mr Sat. Night and I were tucking into this the other evening – he reminded me that we always used to serve it with a fresh green crunchy salad. He’s right of course, because this is a very rich main course, and the salad lightens it a little.


Posted in recipes Tagged with: , , , ,

The May bank Holiday..

P1150547(1)

P1150547(1) P1150725(1)


Ah, we’ve all earned this, haven’t we? It has been the longest winter in living memory, and we’re ready for a little warmth on our old bones. A change in eating habits from comfort food to something a little lighter is also on the cards, hopefully beginning this weekend.

Freiend for dinner - Pimm's in the garden

Freiend for dinner – Pimm’s in the garden

I’ve had a quick look at the weather forecast for all over Ireland, and – dare I say it? – it’s not looking too bad…

A three-day weekend is the perfect excuse for having  friends and family over to admire your garden/efforts at weeding (in my case anyway) and to share some easy and tasty food, and a glass or two of a suitable beverage 😉

The recipes that I’m mentioning here are all over on Eating for Ireland ( www.eatingforireland.com ), but I’ve put the links to each one in for you already. Don’t forget to check out the website for alternatives.

One of my favourite salads is the Warm Spicy Chicken Salad https://eatingforireland.com/recipe/warm-spicy-chicken-and-mango-salad/ You can do so much of this ahead, and just cook the marinated chicken up to 20 minutes before serving ( it’s supposed to be warm, not hot). I serve it on the Turkey plate that my Mum gave me when I cooked my first Christmas dinner. That plate only saw the light of day one day a year, until this salad, that is!

P1160945

P1160942(1)


Pasta bakes are always good for a crowd – especially one that has a bunch of kids in it – Try my Spaghetti Surprise on the kids and see how they like it! https://eatingforireland.com/recipe/family-favourite-pasta-bake/

P1250786 P1250783


That old favourite, Chilli Chicken Pasta is always well received too, and if you make the sauce ahead of time, all you have to do is cook the pasta, heat the sauce and add the Mascarpone..

chilli chicken


Don’t forget to look up my home-made burgers https://eatingforireland.com/recipe/build-your-own-burger/ and the crispy oven cooked potato wedges https://eatingforireland.com/recipe/my-home-made-crispy-oven-chips/ to go along with them!

burger 2 InstagramCapture_edb5af0a-8259-42cd-82ec-e0762979cda4

For desserts:

You can’t go wrong with the All-in-one Chocolate cake – loved by kids and adults alike!

p1190433 p1190444


And even my famous Cheat’s Chocolate Trifle goes down well at this time of year!https://eatingforireland.com/recipe/the-easiest-ever-christmas-trifle/

trifle (2)Trifle (2)


For a simple but effective dessert try making some of my easy scones https://eatingforireland.com/photo/my-everyday-scones/  and serve them with some softly whipped  cream and some good old-fashioned raspberry jam, or if you’re feeling lavish, some delicious Lemon Curd https://eatingforireland.com/recipe/home-made-lemon-curd/

Lemon Curd (6)

scones (2)


Whatever you get up to, and whatever the weather, I’m wishing you all a lovely relaxing weekend!

Becks xx

PS: Don’t forget to check out the website for other weekend inspiration!

Posted in Blog

Chicken, Chilli, Chorizo and Pineapple kebabs, with savoury rice..

Chicken kebabs (5)

Chicken kebabs (5)

The end of April has me moving towards less wintery dinners this week. Even though it’s still very cold at night, the bright evenings are changing what I want to eat.

That’s why I’m sharing this slightly summery, but still substantial, main course with you. It’s the sort of dinner that can be prepared ages beforehand and then brought together in about 20 minutes when you’re ready to eat.

Let’s take a run at this..

EQUIPMENT:

  • A non-plastic bowl to marinate your chicken.
  • A grill pan, an over-head grill with rack and tray, or a barbeque (if you’re lucky enough to decide to make this on one of the 3 nights a year that we can barbeque in Ireland 😉 )
  • Tin foil, to line the grill pan (makes clearing up so much easier..)
  • A deep-sided frying pan
  • Approximately 2-3 metal or wooden kebab holders per person – if using wood, soak in cold water for 10-15 minutes.

INGREDIENTS: For the kebabs: this is plenty for about 4 people..

  • 2 skinless chicken thighs or 1 chicken breast per person
  • 2-3 small red onions cut into quarters

Chicken kebabs (10)

  • 200g approximately of Chorizo sausage, cut in two, then into 2-3cm lengths.(see picture below)

Chicken kebabs (9)

  • juice of a large lemon
  • 2 cloves of garlic
  • 1 fat chilli – de-seeded and diced small
  • 2 tablespoons of Olive oil
  • 1 fresh Pineapple, all the skin cut off, and sliced vertically into 4, the hard core removed, and the flesh cut into 3-4cm chunks.

Pineapple

For the savoury rice:

  • 225g Basmati rice, cooked, rinsed and cooled.
  • 3-4 Spring onions, finely chopped, including green parts
  • 1 small red or green chilli, finely chopped
  • Half a red, yellow or other Pepper – finely diced
  • 2 cloves of garlic, finely chopped
  • 4-5cm piece of fresh ginger, peeled, cut into thin sticks.
  • 1 tablespoon of Rapeseed oil
  • 2 tablespoons of Soy sauce
  • 1 teaspoon of ground coriander
  • 1-2 tablespoonfuls of Fish sauce
  • about 1/5th of the fresh Pineapple from the Pineapple above, cut into fine dice
  • Handful of chopped fresh Coriander, to garnish.

METHOD:

First marinate your chicken:

  • Mix the Olive oil, lemon juice, chopped garlic and chopped chilli together in the bowl
  • Cut the chicken into fairly large pieces – aim to have 2-3 pieces on each kebab.

Chicken kebabs (7)

  • Mix the chicken into the marinade ingredients, cover and leave in a cool place for 30 minutes or until you’re ready.
  • Prepare the rest of the kebab ingredients as described.
  • Lightly oil each kebab stick before threading any food onto them.
  • Make up the kebabs threading a piece of red onion, the chicken, then Chorizo, then pineapple, and repeat. Put each kebab onto the rack inside the grill tray as it’s ready. See below..

Chicken kebabs (1)

  • Continue until you have enough kebabs made up. If you have left-over ingredients, just distribute them between all the kebabs.
  • Pour any remaining marinade over the kebabs. *you can complete the recipe as far as here in advance*
  • Heat your grill to it’s highest setting.
  • Place the grill tray about 5cms from the heat, and cook for 10-15 minutes, then turn each one over and given them another 10 minutes until the chicken is cooked, the Chorizo is crispy and the vegetables are softened and  singed at the edges.

While the kebabs are cooking you can get on with the Savoury Rice:

  • Heat the oil in the pan on a fairly high heat.
  • Add the spring onions, ginger, pepper and chilli and stir-fry for about 5 minutes, moving them about all the time.
  • Add the garlic and stir in.
  • Add the cold rice and reduce the heat to medium.
  • Stir the rice and combine it with  the vegetables, until they’re evenly mixed through.
  • Add the Soy sauce, and stir in; then add the fish sauce and ground Coriander.
  • Keep moving the rice around as you cook it.
  • Taste and adjust the seasoning.
  • Add the finely chopped pineapple pieces and fold through.
  • Garnish with the chopped Coriander.

To serve:

  • This is a personal thing, but I like putting the cooked kebabs onto everyone’s plate, and allowing each person to slide the contents off using their forks – I always think it makes it a bit of an occasion..
  • 2-3, depending on size, kebabs per person, and a helping of the Savoury Rice.
  • Serve the remainder of the Savoury Rice in a warmed bowl on the table.

Chicken kebabs (6)

NOTES:

  • The most tiresome part of this recipe (for me anyway) is threading the chicken and vegetables onto the kebabs, but once that’s done, you can chill them (covered with clingfilm or foil) until you need them. In this way, this recipe is a great one for ‘prepping now, cooking later’ dinners.
  • I also tend to cook the rice earlier in the day, then cool it immediately and keep it covered, in the fridge, until dinner time.
  • I’ve served this recipe at dinner parties for friends several times, and I think people really enjoy the palaver of sliding the pieces off the kebab.
  • If I’m doing this for a party, I usually serve a yoghurt-based Tzatziki (yoghurt, finely chopped raw onions, chopped, de-seeded cucumber, and fresh mint – adjust seasoning before serving – it always needs salt!) and some warmed flatbreads as an accompaniment.
  • The crispy Chorizo and the fresh Pineapple really improve this recipe.


Posted in Latest Recipe, recipes

Bailey’s Truffles..

Truffles (4)

Truffles (4)

I spotted this little recipe in a magazine before Christmas last year.. lost it; then found it again, thanks to my friend Caroline. This recipe is really easy, but actually takes some time to make, because of the chilling involved. Leave yourself a little time if you can, because making and decorating these, even for someone as useless as I am, is great fun.

I suppose what I’m saying is that you can do this in your own time – so have a go!

EQUIPMENT:

  • a medium/large-sized bowl
  • Food processor, if you have one.
  • wooden spoon
  • baking tray
  • baking parchment

INGREDIENTS:

  • 100g plain Digestive biscuits, ground to fine crumbs in a food processor, or via the old-fashioned way, with a plastic zip-lock bag and a rolling pin.
  • 50g full fat cream cheese
  • 150g white chocolate melted and slightly cooled
  • 3 tablespoons of Baileys liqueur, or really, any liqueur you like.

For decoration: about 100g each of dark and white chocolate, melted separately.

METHOD:

  • Melt the chocolate in a large bowl (I use the microwave; mine’s 1000w and takes about 1 min, 30 secs to melt that amount of chocolate.)
  • Add the biscuit crumbs and cream cheese to the chocolate, and mix well, using a wooden spoon.
  • Add the Baileys and mix it in.
  • Cover the bowl and put it into the fridge for at least 3 hours.
  • Put a sheet of baking parchment onto a baking tray and put it into the fridge to cool
  • Remove the bowl from the fridge, take teaspoon-sized pieces out, and roll them into a ball with your hands.
  • Place each truffle onto the chilled baking tray as you make it. You should get about 30 truffles from this mixture. See NOTES.
  • Return them to the fridge while you melt the chocolate – the aim is to keep the truffles as cold as possible while you’re handling them.
  • Roll each truffle in the melted chocolate and remove it with the tips of two forks, let it drain for a couple of seconds, then put it back onto the chilled baking parchment.
Truffles (1)

Amateur hour!!

  • Drizzle a little dark chocolate over the white chocolate covered truffles. I find the easiest way to do this is to swing a small spoonful back and forth quickly over the truffles from a height of about 40cms. It’s a bit messy, but works best I think.
  • If you like, you can think up a few decorations to go onto the chocolate – I used the gold spray (see picture in NOTES) I bought some dried raspberry pieces this week with these little truffles in mind. Desiccated coconut would be good too, or even just rolling them in some sifted Cocoa powder – the choice is yours!
  • These little truffles should be kept in the fridge – I’d say that they’d keep for about a month like that.

NOTES:

  • Those who know me well will agree that I have very limited patience with fiddly stuff, so my final result is never going to win any beauty contests. No doubt you will do this much better than me, so please feel free to post your perfect specimens on the Eating for Ireland Facebook page.
  • Try not to do as I did the first time I made these – I made some of these too big – you have to remember that you’re going to be putting a chocolate overcoat on these. They are very rich indeed, and the larger ones were too much of a good thing. I got 24 out of this recipe, but I think you should aim for making 30. If you’re a perfectionist, you’ll weigh each truffle as you roll it, to ensure equality of measure .. 😉
  • VARIATION: I’m making this recipe for Easter this year, so I’ve simply doubled the ingredients, then divided it into two different bowls; one for each flavour – the first will be Bailey’s, but as a gesture towards Spring, (not that there’s any sign of it out there today) I’m making a Limonchello version as well. Just replace the Bailey’s with the Limonchello. If you don’t have any Lemon liqueur (mine was a gift), or you want a non-alcohol version, I would suggest the finely grated zest of a large lemon, and one or two tablespoons of freshly squeezed Lemon juice. Taste it and see what you think..
  • The box you see in these pictures was one that I kept for just such an occasion. It just proves that presentation means a lot – for instance, it made these completely ham-fisted efforts look elegant!
  • You should probably drizzle the dark chocolates with white, but I had bought this little pack of edible gold spray, and was dying to use it. I think it looks quite good..


P1300489


Truffles (3)

Posted in Blog, Latest Recipe, recipes Tagged with: , , ,

A little planning for Easter..

P1230873
P1230873

Easter morning prep..


I usually spend a happy half hour in the week before Easter (oops! that’s this week!) to plan what we’re going to do, where we’re going to visit, who’s coming over, and what we’re going to eat over the 4-day weekend..

A lot of Easter food is traditional; it certainly was when I was a kid at home – it was Lent – all 6 long weeks of it – followed by a special Easter breakfast; then Easter eggs, and a Leg of Lamb for Easter Sunday dinner. I love the Leg-of-Lamb dinner – it was one of my Mother’s specialities – she did it with garlicy French beans and roast potatoes; my sister still does this delicious traditional Easter dinner. Mind you, I’m very partial to a nice Roast Chicken (or it’s newer, but equally excellent alternative, Turkey) dinner, with all the trimmings. At home, I take requests for special dinners, so it’s usually whatever the family wants.

I think that a nice dessert after Easter Sunday Lunch is an essential, and my Chocolate and Raspberry Tiramisu fits the bill perfectly.  Here’s the link: https://eatingforireland.com/recipe/raspberry-tiramisu/

It’s best made a day ahead, so it’s really easy from the prep point-of-view. It’s all done and forgotten about until you need it.

P1220983

As in many other homes across the country, the Child is coming home for Easter. So this is my chance to take a trip down memory lane for her – and cook or make some of her childhood Easter favourites – Shredded Wheat Chocolate Nest anyone?  https://eatingforireland.com/recipe/crunchy-chocolate-easter-nests-for-kids-of-all-ages/ This is a great one for getting the kids involved – we used to love making the chocolaty nests, and of course, there was always the spoon to lick afterwards !

P1140816

It really makes me happy to see those traditional yellow chicks in the shops every year – they’ve been on the go forever! :)

Naturally, there is no limit to the amount of Chocolate on offer at Easter, so my old standby, the All in One Chocolate Cake will get trotted out too. https://eatingforireland.com/recipe/hilarys-all-in-one-chocolate-cake/

p1190433

p1190440-2

My Chocolate cake often doubles up as a dessert, with the addition of some raspberries and a dollop of cream :)


A new favourite is the ginger cake which, sneakily, just changes its winter coat to become an Easter cake..

https://eatingforireland.com/recipe/preserved-ginger-cake-with-lemon-icing/

P1140839

Just click on the link above..

I’m not a great baker, and only do the ‘yeast’ thing rarely, but this year’s Hot Cross buns were, if I may say so, a triumph – and really easy – remember the golden rule: if I can do it, so can you! Click on the link below to have a wee look..

https://eatingforireland.com/recipe/hot-cross-buns-a-little-effort-but-well-worth-it/

P1230708

Search for ‘Hot Cross Buns’


P1230716

And although they really are only fabulous on the day you make them, they toast very well, and freeze too, for reheating later on.

If you’d rather not mess about with yeast, Mr Saturday Night was extremely complimentary about the Hot Cross Scones which I tried earlier in the month.. https://eatingforireland.com/recipe/hot-cross-scones/

P1230645

Hunt for ‘Hot Cross Scones’ in the recipes

I love pulling out all my wee Easter-y bits – like the linen tablecloth made many moons ago by a much-loved Aunt – it still has the laundry mark on it :)

P1230859

The china eggs, which by some miracle have survived the years in one piece..

Easter (2)

My gorgeous vintage Arklow pottery egg-cups – a fabulous find in a local charity shop..(the modern ones behind came with Easter eggs I think!)

P1230878

So Happy Easter to all – relax, eat Chocolate, chat with family and friends.. :)


Posted in Blog Tagged with: , , , , ,

Posh Sausages in Yorkshire Puddings, with Red Onion gravy

Red onion gravy, yorkshire pudding (15)

Red onion gravy, yorkshire pudding (15)

When I produced this cute little dinner one night this week, Mr Saturday Night was delighted – it’s comfort food at it’s best – sausages, home-made gravy and Yorkshire pudding – does it get any better than that?

It’s a really good way of making a ‘sausage and mash’ dinner into something special. If you’ve bought some nice sausages, you might want to give this a go sometime. Otherwise, the Red Onion Gravy is a little recipe worth keeping up your sleeve, as is the Yorkshire pudding recipe.. I’m going to post them both up separately later on, for ease of use.

EQUIPMENT:

  • baking tray, for the sausages ( If you always fry your sausages, you’ll need a frying pan; if you always grill them, a grill etc..)
  • small – 15cm- round tins, for the Yorkshire puddings, or a large, deep roasting tray.(see NOTES)
  • small saucepan, for the gravy
  • medium/large bowl
  • A whisk (hand-held is fine)

INGREDIENTS: for 4

  • 3 really good quality sausages per person (I used Venison)

Red onion gravy, yorkshire pudding (5)

For the Red Onion Gravy:

  • 2-3 large red onions, peeled and thinly sliced
  • 1 tablespoonful of vegetable oil, and a knob of butter
  • tablespoon of fresh Thyme, or a teaspoon of dried.
  • 1 dessertspoon of plain flour
  • Splash of red wine or Port
  • 300mls hot beef stock
  • squeeze of lemon juice

For the Yorkshire Puddings:

  • 175g  plain flour
  • 2 large eggs
  • 175ml cold water
  • 75ml milk
  • salt and pepper


METHOD: I make the gravy first, so that it can be bubbling away gently while I get on with the rest

  • Heat the oil and butter on a fairly high heat.
  • Add the sliced onions and coat them in the oil/butter mixture.

Red onion gravy, yorkshire pudding (6)

  • Cover, and reduce the heat a little until they’ve softened.
  • Add the finely chopped thyme
  • add the wine and allow to bubble up and reduce.
  • add the flour, and stir in well- the mixture should look fairly dry at this stage.

Red onion gravy, yorkshire pudding (8)

  • Add the hot stock gradually , stirring all the time.
  • The gravy will thicken up – if you think it’s too thick, just add a little more hot water.
  • Taste and adjust the seasoning – you might want to add the lemon juice at this stage – just a tiny squeeze to sharpen the flavours.
  • Put the pot into a very low heat at the back of the hob until you need it
  • Put the sausages on to cook.

Make the batter for the Yorkshire Puddings:

  • Season the flour with salt and pepper
  • add the eggs and whisk in – this will be a horribly sticky mess, but don’t panic!
Red onion gravy, yorkshire pudding (10)

Do. Not. Panic. It always looks like this..

  • Add the milk/water mixture a little at a time, whisking vigorously as you go
  • Add the last of the liquid, and whisk again. You should have something that looks like pancake batter.
Red onion gravy, yorkshire pudding (12)

Ta-da!!

  • This batter will wait (in a cool spot) until you’re ready to make the puddings
  • Check that the sausages are completely cooked – keep warm.
  • Put the oven on to a very high setting – I usually put mine to 220 degrees
  • Add a tablespoonful of vegetable (not Olive) oil to each dish that the Yorkshire puddings are going to be made in (see NOTES)
  • Put the dishes into the hot oven until they are really hot, and the oil is almost smoking.
  • Remove the dishes (CAREFULLY!) from the oven and immediately divide the batter evenly between them – if the oil is properly heated, you’ll see the batter start to cook at the edges.
Red onion gravy, yorkshire pudding (14)

I think my oil wasn’t quite hot enough..

  • return the dishes to the oven and leave, at the high heat for about 15 minutes – if you watch, you’ll see them rise up and brown in the oven.
  • Remove the cooked Yorkshire puddings from the oven, and place them on warmed  dinner plates
  • Add the cooked sausages and top with the red onion gravy

Red onion gravy, yorkshire pudding (16)

  • Serve with mashed potato or Champ.

NOTES:

  • The dishes for the Yorkshire Puddings will vary – this recipe is enough to make 12 x muffin-tin-sized puddings (use a teaspoon of oil in each), or 4 x 15cm/6 inch individual puddings (like the ones in the pictures) or one small, deep roasting tray (mine’s about 30×20 cm) Use 2-3 tablespoonfuls of oil for the large tin.  If you’re making the smaller puddings, you could cut your sausages in half to fit them into each pudding. If you’re making one large pudding, just cut it into 4/6 pieces, making sure that everyone gets a nice crunchy side bit, then arrange the sausages and gravy on it.
  • Yorkshire puddings can be made ahead and reheated when required, and the gravy can too. And of course you can buy ready made..
  • The lemon juice in the gravy is optional – I think it depends on what kind of onions you’re using. Be sure to taste it before deciding to use the lemon juice, and even then, use just a teaspoonful.
  • These are very good for parties – You can make individual Yorkshire puddings earlier in the day, then fill them with cooked cocktail sausages, heat them in the oven until piping hot, and give each one a dollop of gravy as you serve them..
Posted in Latest Recipe