

Stem Ginger scones
Having been asked if we needed anything, and saying a firm no while at the garage earlier on, I found myself at home on Sunday afternoon with no eggs and no treacle to make another Stem Ginger Cake for our Sunday afternoon treat. https://eatingforireland.com/recipe/preserved-ginger-cake-with-lemon-icing/
A disaster, nothing less..
So while my ‘organised store-cupboard’ title might have been deservedly rescinded, my ‘original thinker’ and ‘make-do-and-mend’ modes flickered on, and here we are, with a really excellent Stem Ginger scone recipe which I’m very happy to share with you..
*bows, and waves to the audience* (modest, as always 😉 )
EQUIPMENT:
- A large flat baking tray
- A piece of baking parchment the same size as the tray
- a large bowl
- a hand whisk
- A hand or box grater
- a measuring jug
- a flat-bladed knife
- a chopping board
- A sharp knife
INGREDIENTS:
- 350g self-raising flour
- half a teaspoon of Baking Powder
- pinch of salt
- 85g of very cold unsalted butter
- 2-3 tablespoons of caster sugar
- 3-4 pieces of stem ginger, fairly finely chopped
- 50mls of syrup from a jar of Stem Ginger (I get mine in Sainsbury’s)
- 150mls Buttermilk
METHOD:
- Heat the oven to 200º Fan – that’s a hot oven.
- Put the empty tray in to heat
- Measure the flour, Baking Powder, and salt into the bowl, and mix together using the whisk.
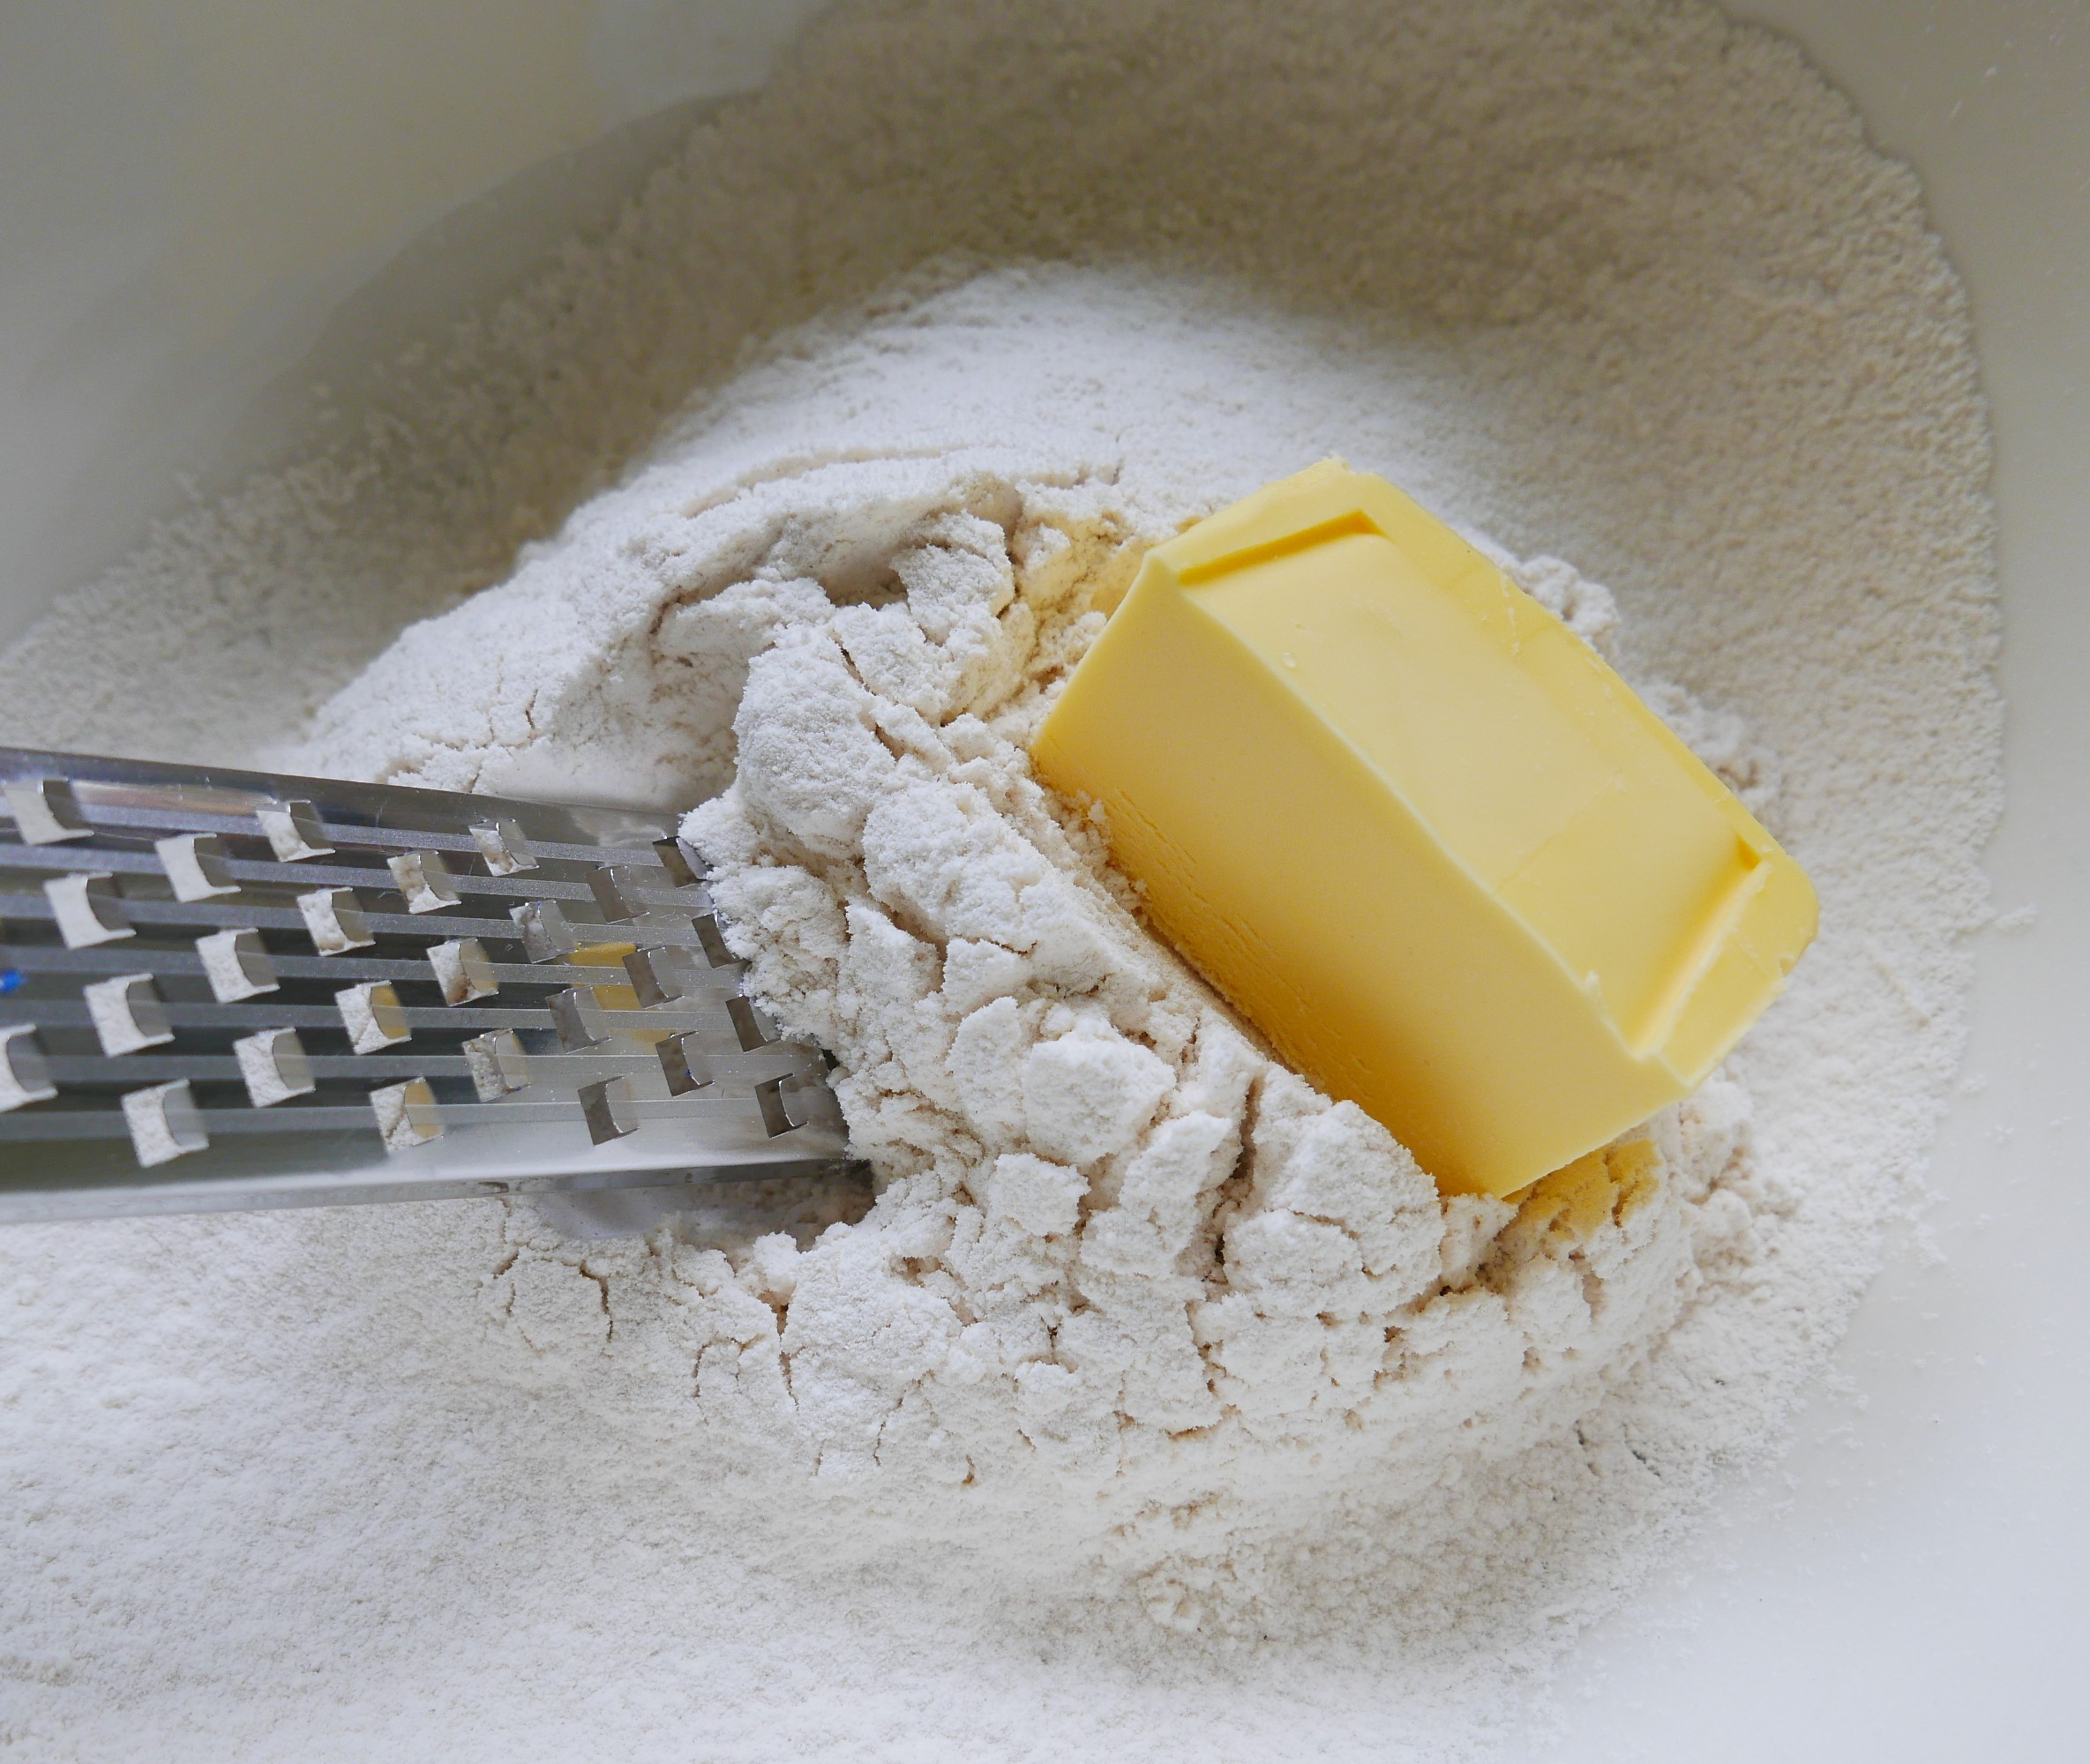
Ready to grate in the butter..
- Pour the ginger syrup into the measuring jug, then top it up to 200mls with the Buttermilk.
- Grate in the cold butter, dipping it into the flour to stop the heat from your hands melting it.
- Using your hands, rub the grated butter into the flour until it mostly looks like fine breadcrumbs
- Mix in the sugar now.
- Add the chopped Stem Ginger into the flour mix, make sure it’s well distributed, and each piece of ginger is separated from its neighbour. It’s worth spending a little time (like 2 minutes) on this.
- Whisk the ginger syrup and the buttermilk together, then add it to the dry ingredients.
- Using your flat bladed knife, mix it all well together, until it starts coming together. Then you need to get your hands in there and start bringing all of the mixture into one piece. This takes a couple of minutes, until the dough starts to get a little warmed up by your hands and begins to start behaving itself. Try not to add any more liquid if you can help it, it will make the scones fall over, which isn’t the end of the world, they’ll still taste great
- Sprinkle a little extra flour onto your worksurface, then lift the lump of dough onto it.
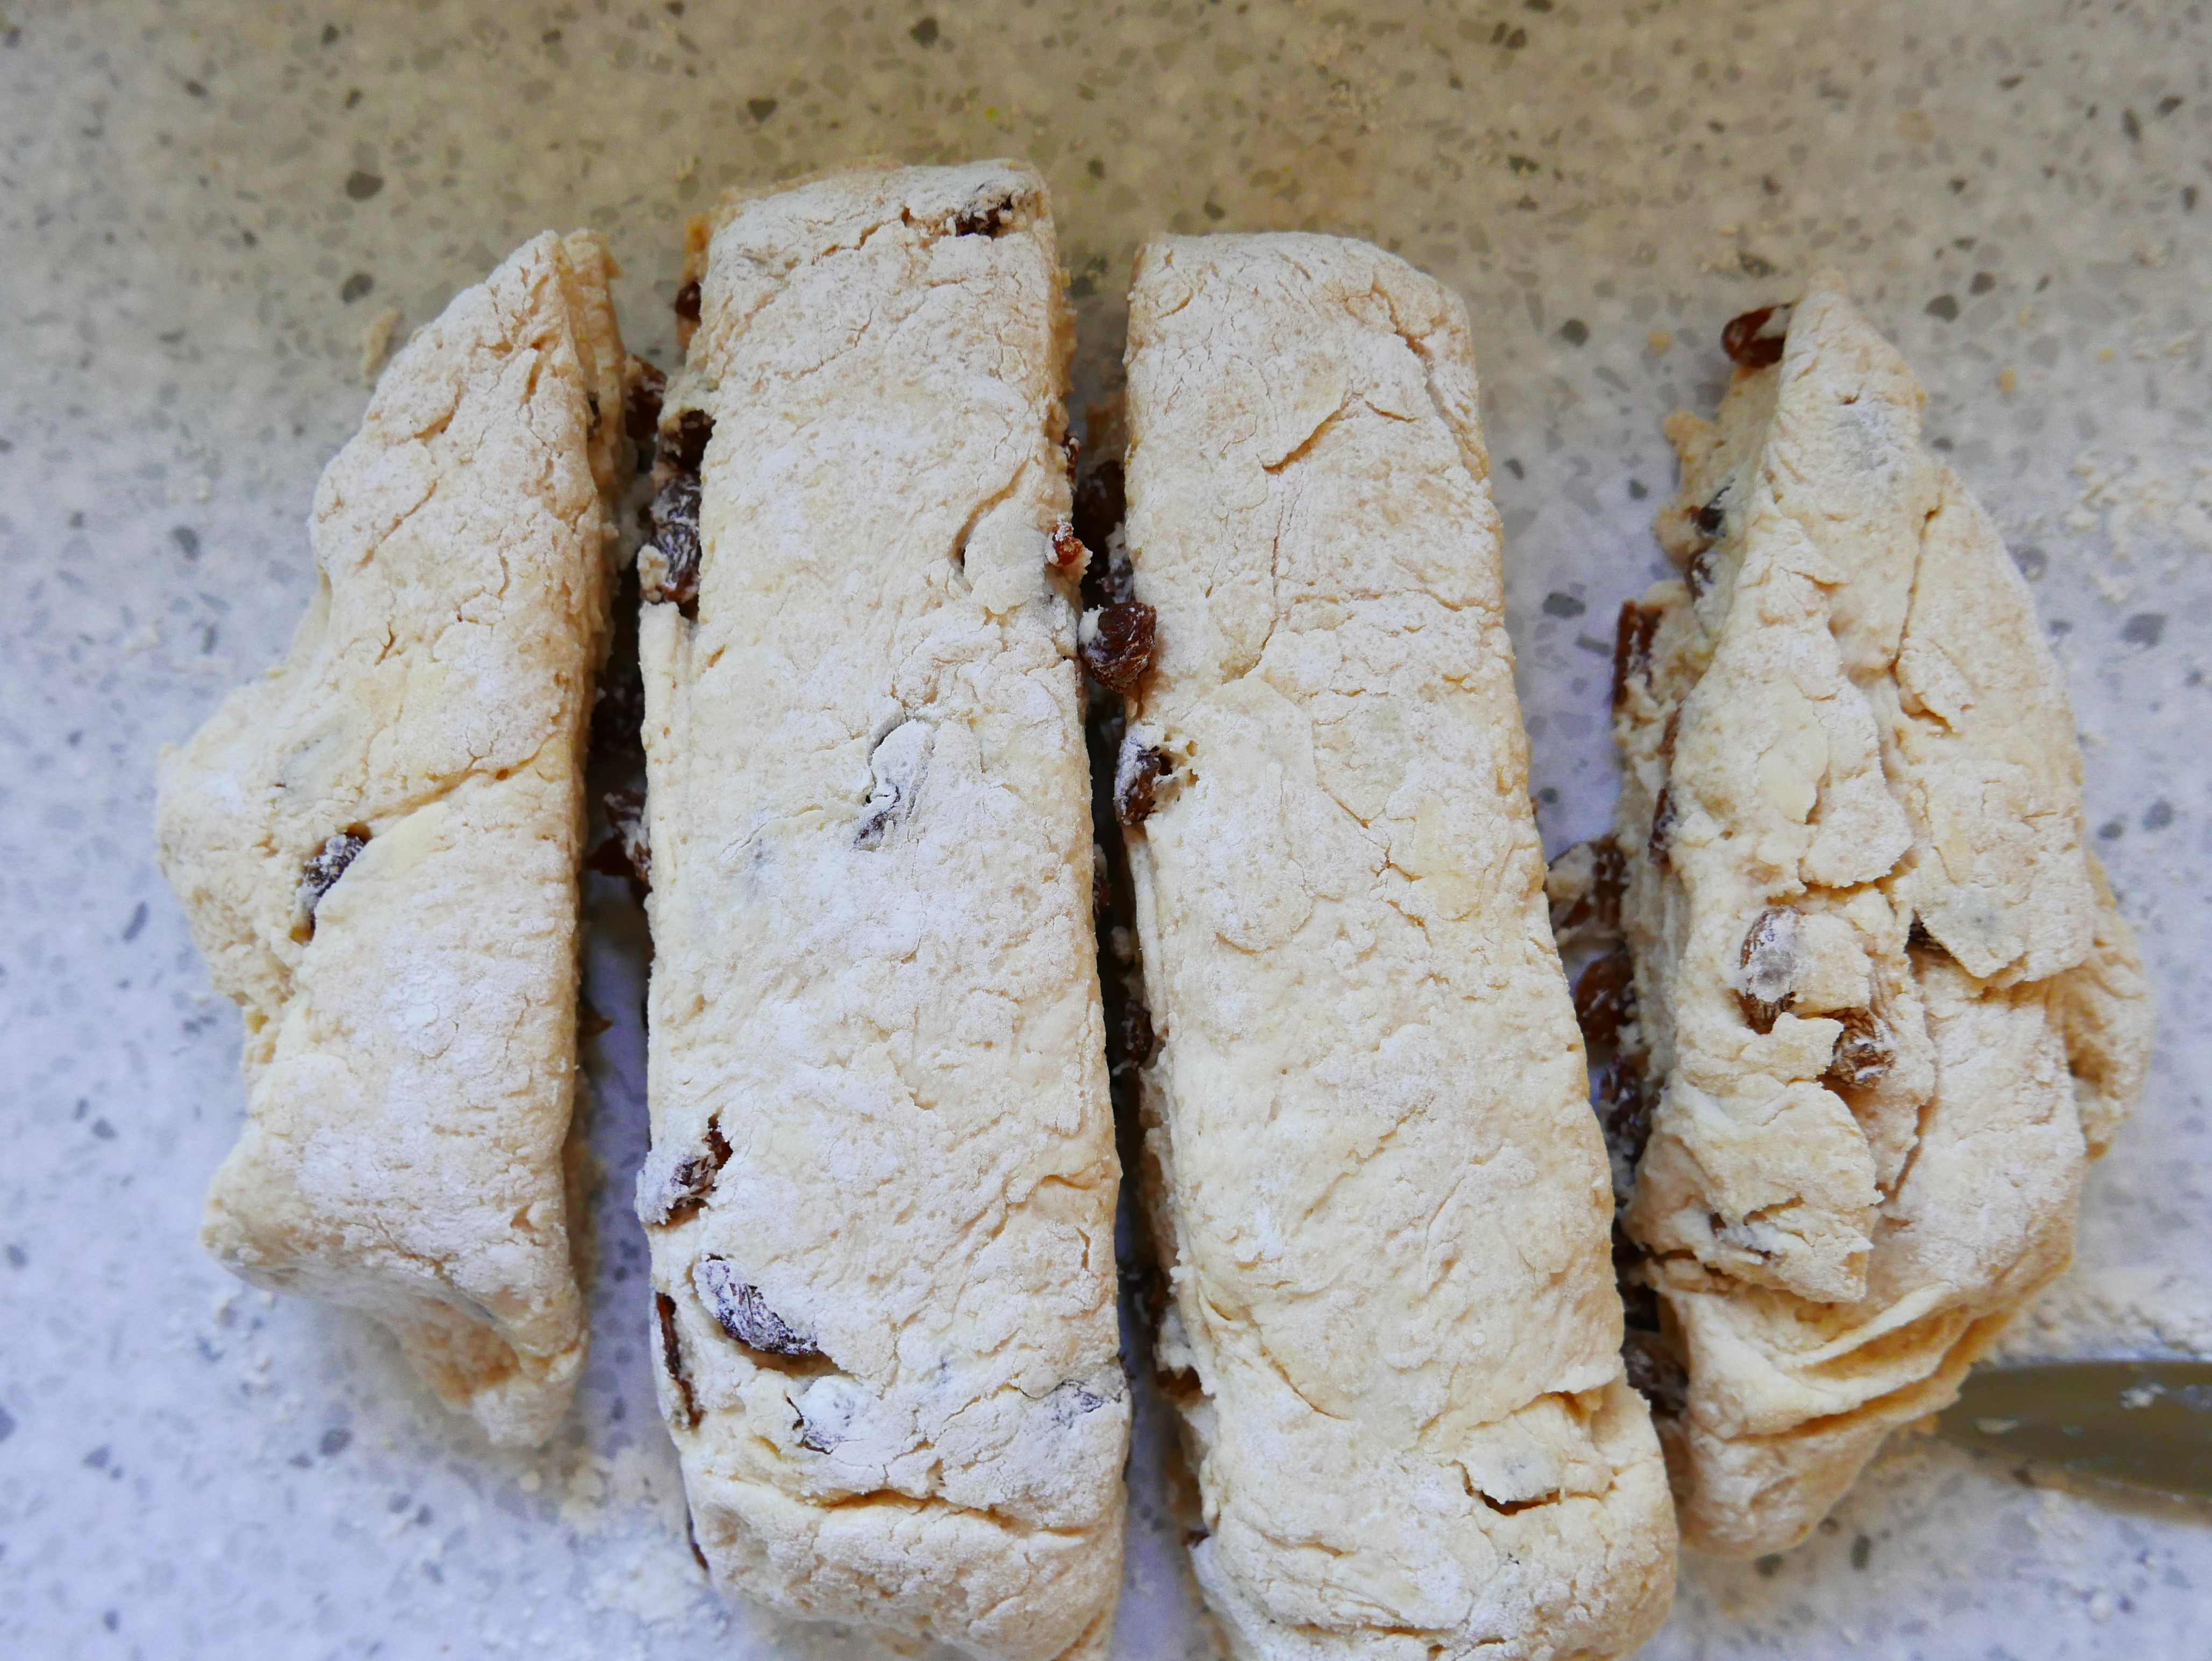
This is a picture of Fruits cones, but the cutting technique is the same
- Pat and shape it into an oval shape about 1 inch/3cms deep.
- Bring the sheet of baking parchment over to the working area
- Cut the dough in half, and then cut it again.
- You’ll get two large scones from both end bits, and 3 or 4 from the two middle sections.
- Put each scone onto the baking parchment, separated from its neighbours, as you cut them.
- Using a dry tea towel, remove the tray from the oven – it will be hot
- Slide the parchment onto the tray, rearrange any scones that have moved, then pop it back into the oven, and set the timer for 10 minutes.
- After the 10 minutes, carefully turn the tray 180 degrees, to even the bake, and give it about 2-3 more minutes.
- Remove to a cooling rack.
- I like these best with just cold butter, but please, feel free to serve them as you wish!
- They’ll still be good the next day (said she, munching on one of yesterday’s scones!)

NOTES:
- I never used to pre-heat the baking tray for scones, but I think it makes a huge difference, particularly with this short baking time.
- You could of course use your favourite scone/cookie cutter to make these a different shape, but I’ve got used to just cutting my scones, so now that’s just what I do.
I started writing down recipes in an old copybook when I was about 16. With 6 children at home, my Mother was always glad of a hand in the kitchen, and really allowed us to experiment - as long as we washed up afterwards, and left the kitchen immaculate! Having a tidy kitchen has followed me through my life, as has the habit of writing down my favourite recipes; except that these days I write them for my website, and add photographs when I can. The website really started when it occurred to me that my daughter might like to have these recipes when I've forgotten them. In my early days of cooking for family and friends, I used to phone my Mum all the time to ask her for the recipe for some of our favourite family dinners. She rarely had a recipe to hand - I think, like me, she made a lot of it up as she went along.. So welcome to Eating for Ireland - these are the recipes that my friends and family having been eating these past 40 years.. yes, I truly am ancient! They are tried and tested, and have worked for me for all that time - I have updated them as new ingredients became available - I really hope you'll find something that you can make into a family favourite of your own. You don't have to tell anyone where you found these great new dishes that you're serving up - it can be our little secret, but I'd really love it if you could give me a sneaky 'follow' on Facebook and Instagram.. So off you go - have a good rummage around, you're bound to find something new! My sincere thanks to all of you who have found a recipe that you liked and dropped me a line to tell me - I really do love to hear from you! Happy Cooking! Becks xx