
This is probably the one and only recipe on eating for Ireland that involves deep-frying. I’m not a fan of deep-frying; neither do I have a deep-fat Fryer, so why did I break the habits of a lifetime to make onion rings in my wok this evening?
I’ll tell you – both me and Mr Saturday Night absolutely love Onion Rings, but have been generally dissatisfied with what was on offer several times recently –
A: Why are onion rings so stodgy? We’ve had onion rings with the equivalent of a duvet wrapped around them..
B: Why do they only give you 1 or 2 onion rings with your dinner? Even an extra portion is only about 4-5 onion rings.. 
I mean, it’s not as if the ingredients cost anything – onions are one of the cheapest vegetables around, and all you need is flour and water, and oil to fry them in.. I honestly don’t know..
So this evening, we were going to give them a go ourselves, to see if there was indeed some mystical magical spell that needed to be completed before we could get our hands on a decent Onion Ring..
And here are the results of our intensive investigation: They’re as easy as pie!!
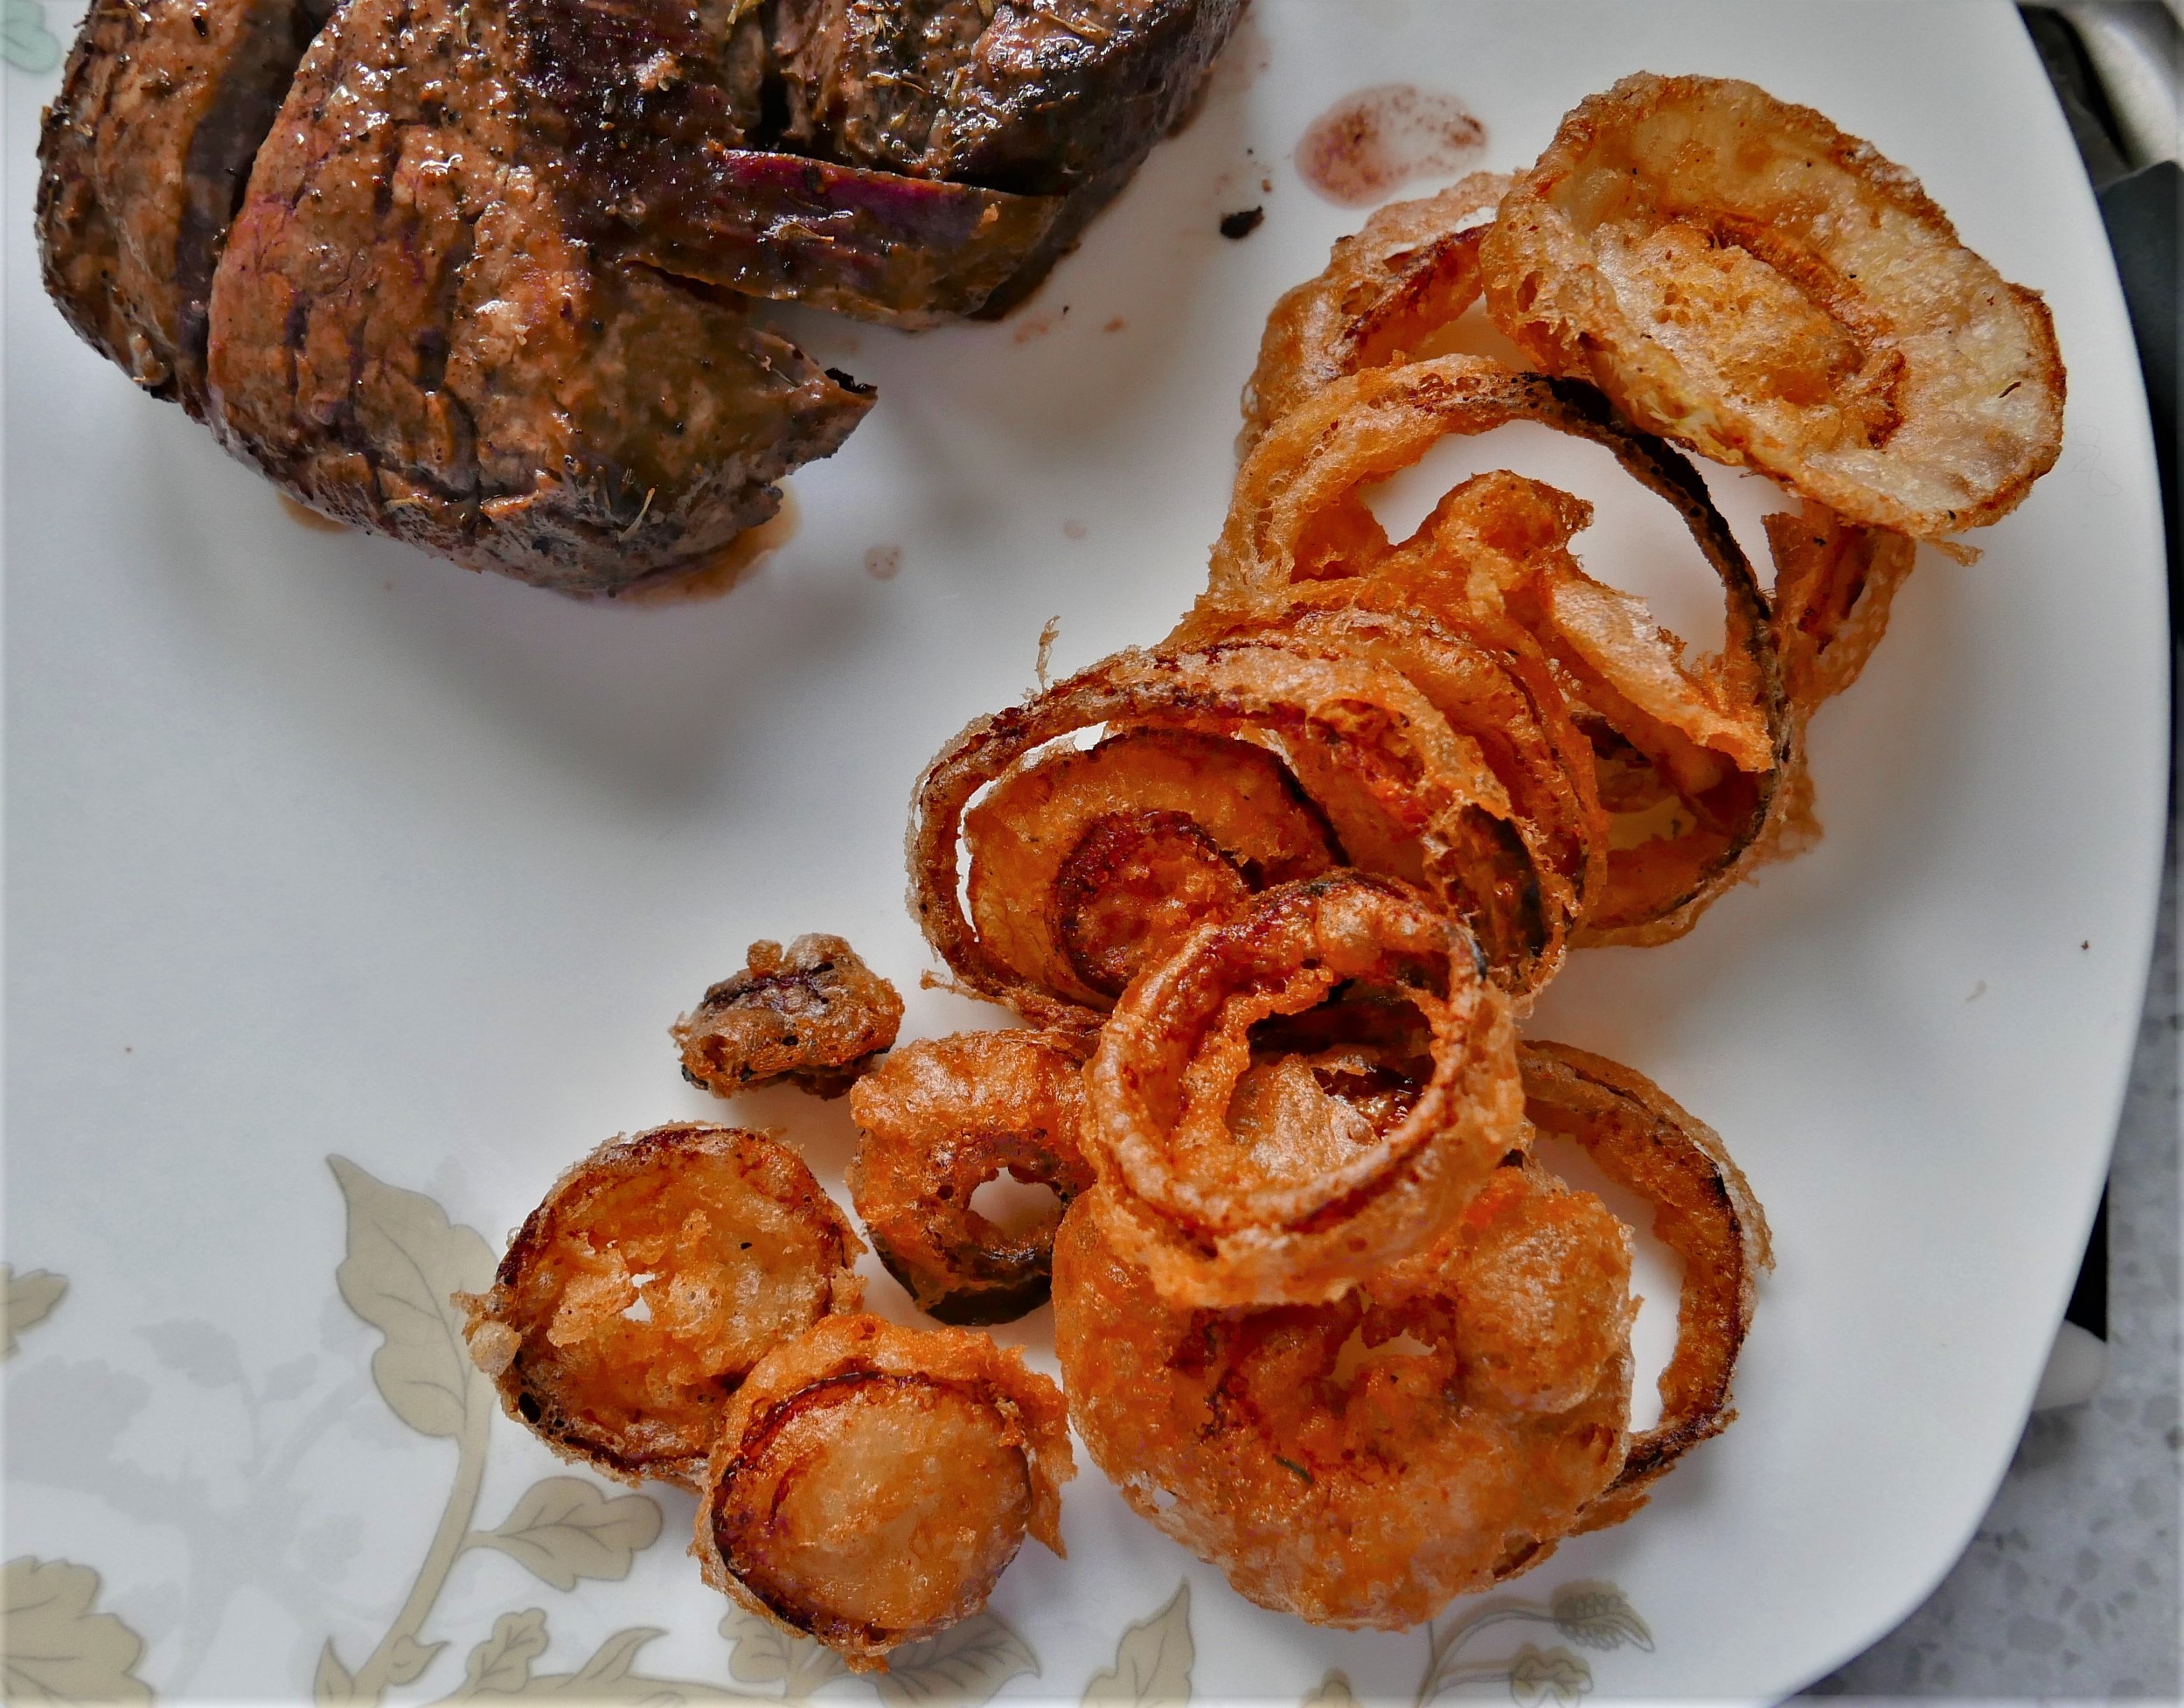
And whilst I say that – and it’s true – it’s also true that they are fairly labour-intensive, and – you know – deep-fat-frying… But they are seriously delicious, so as a rare treat, I’ll definitely be making these again – but not every week.. 
EQUIPMENT: 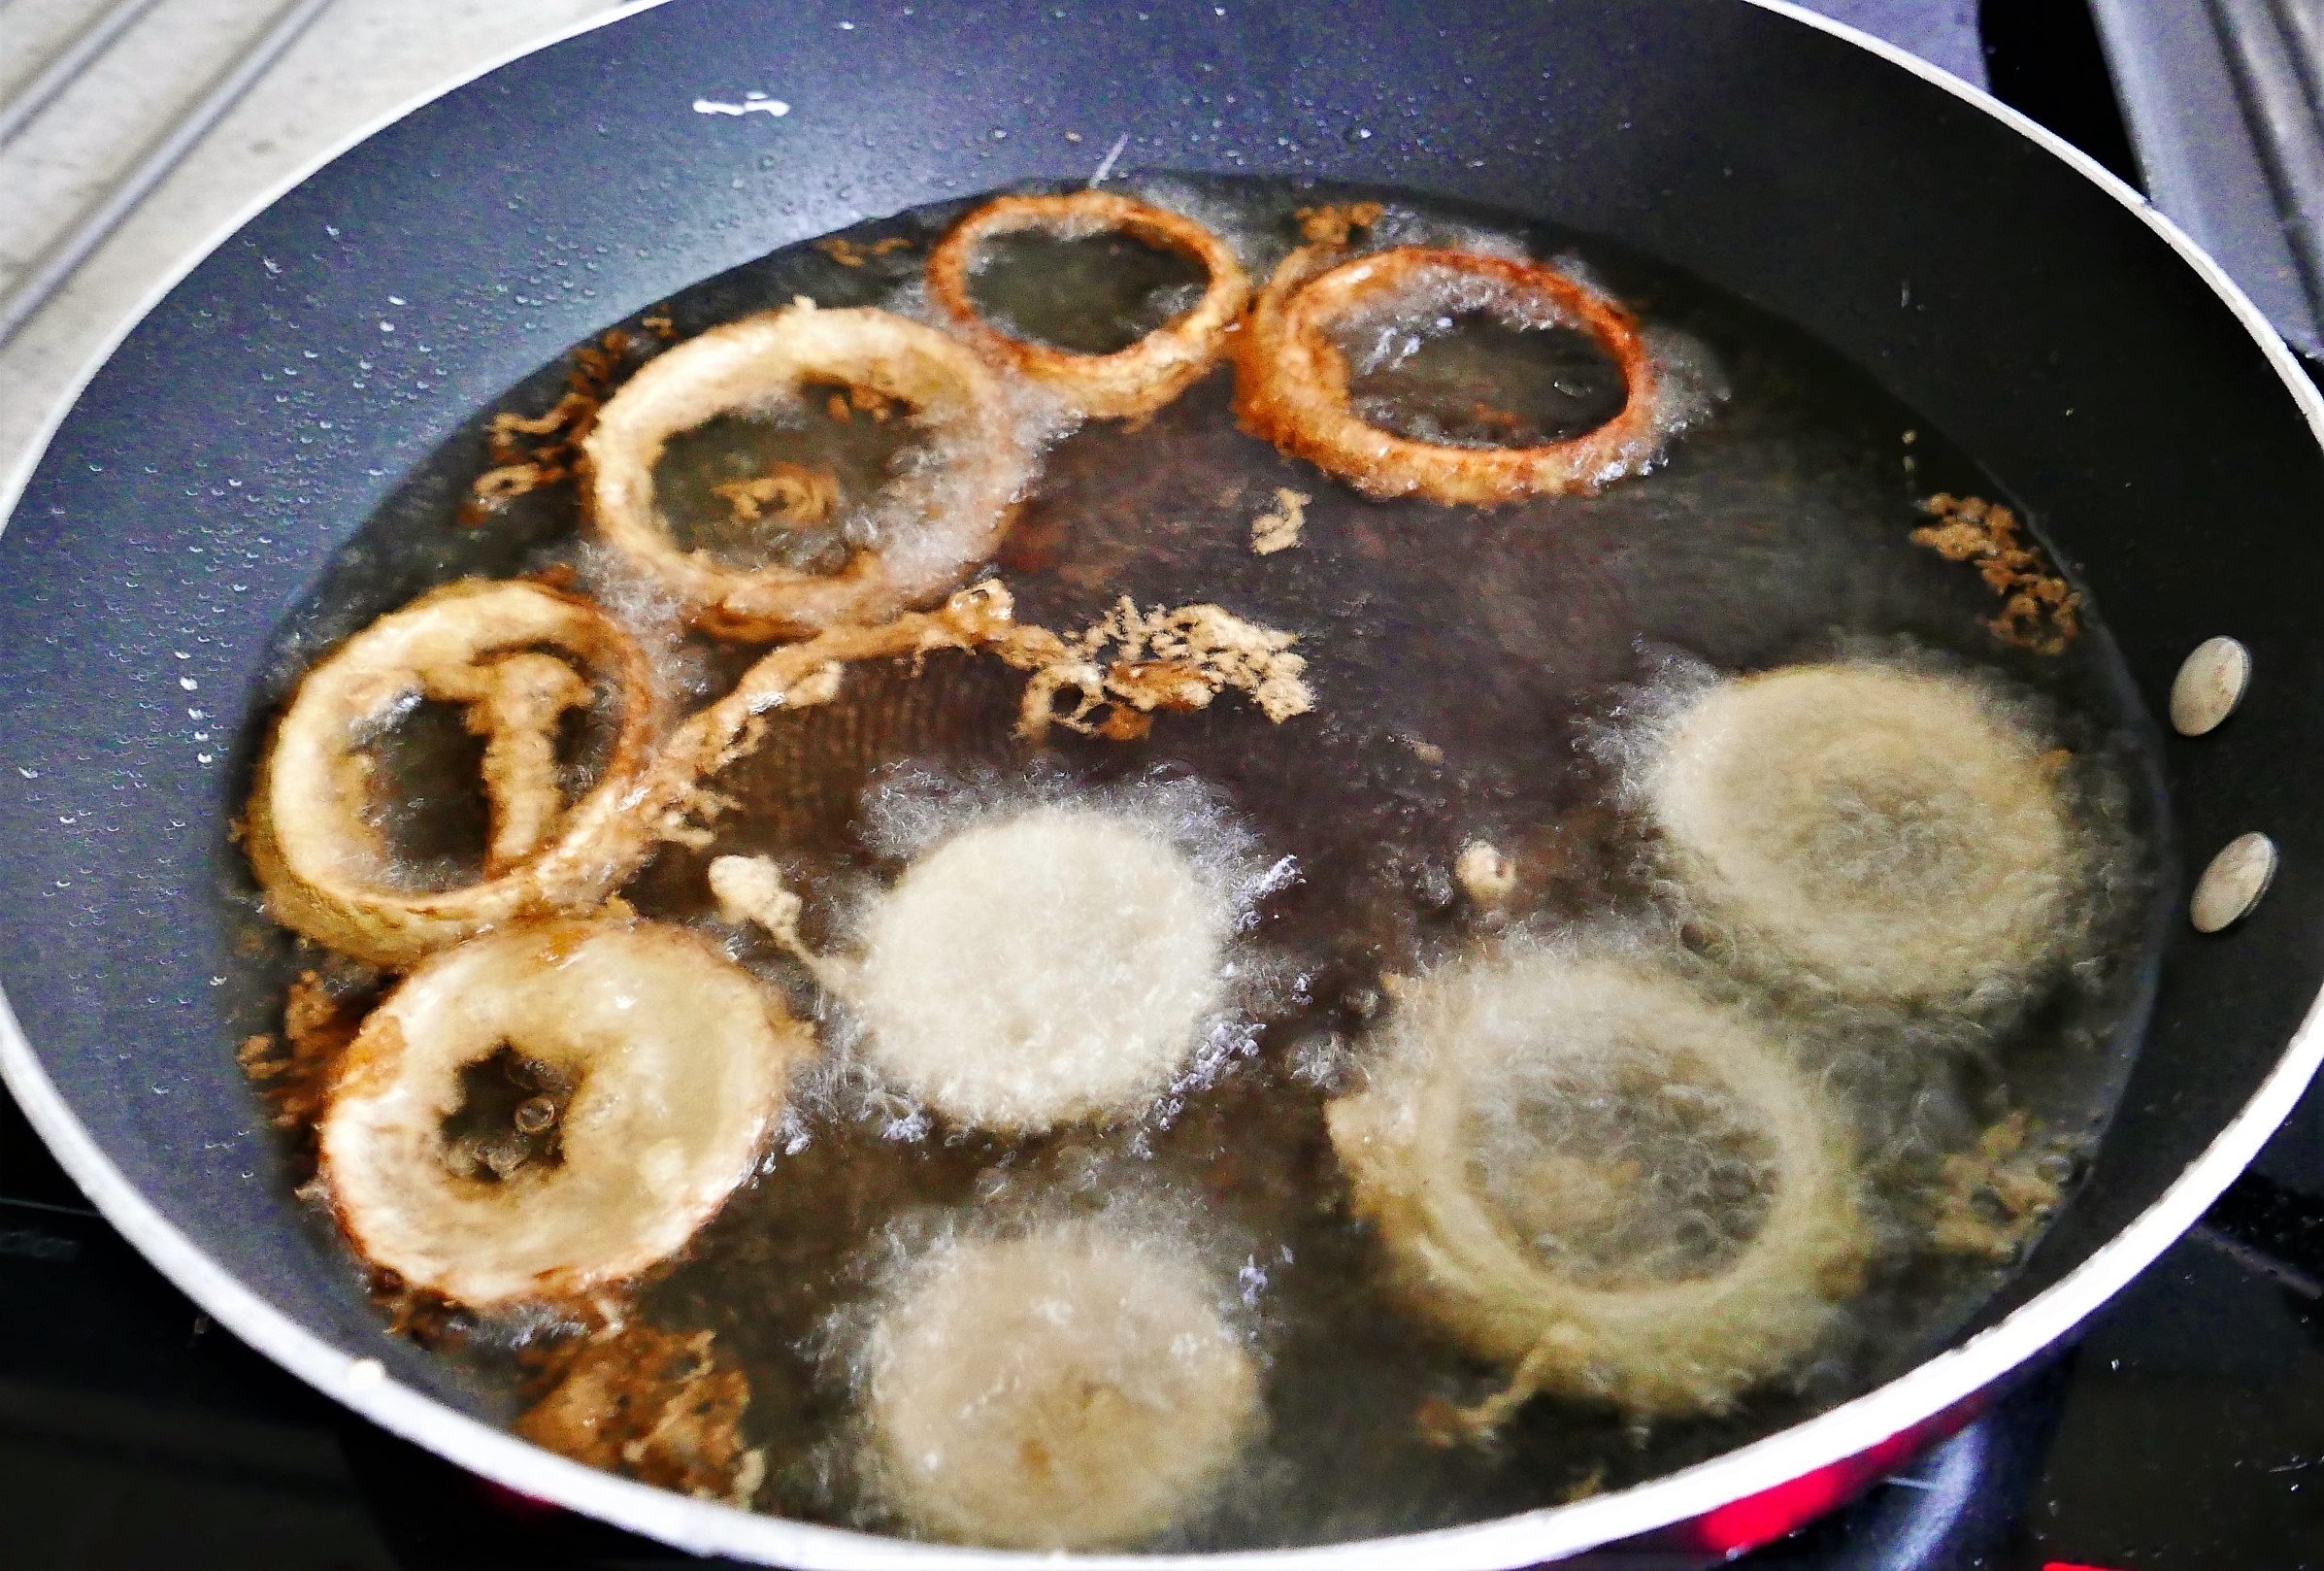
- A deep-fat-fryer, or a flat-bottomed wok
- A pair of food tongs
- A medium-sized bowl
- A hand-whisk
- Plenty of Kitchen roll
- A shallow-sided baking tray with a sheet of baking parchment on it
INGREDIENTS: To feed 2-4 lucky people
- 2 Medium-sized onions, peeled and cut into 1cm slices, then the individual rings separated
- 150g Self-raising Flour
- 150ml Sparkling or Soda Water
- Salt and Pepper
- A small sprinkle of Cayenne Pepper – optional
- About 750mls flavourless oil – I used Sunflower Oil
METHOD:
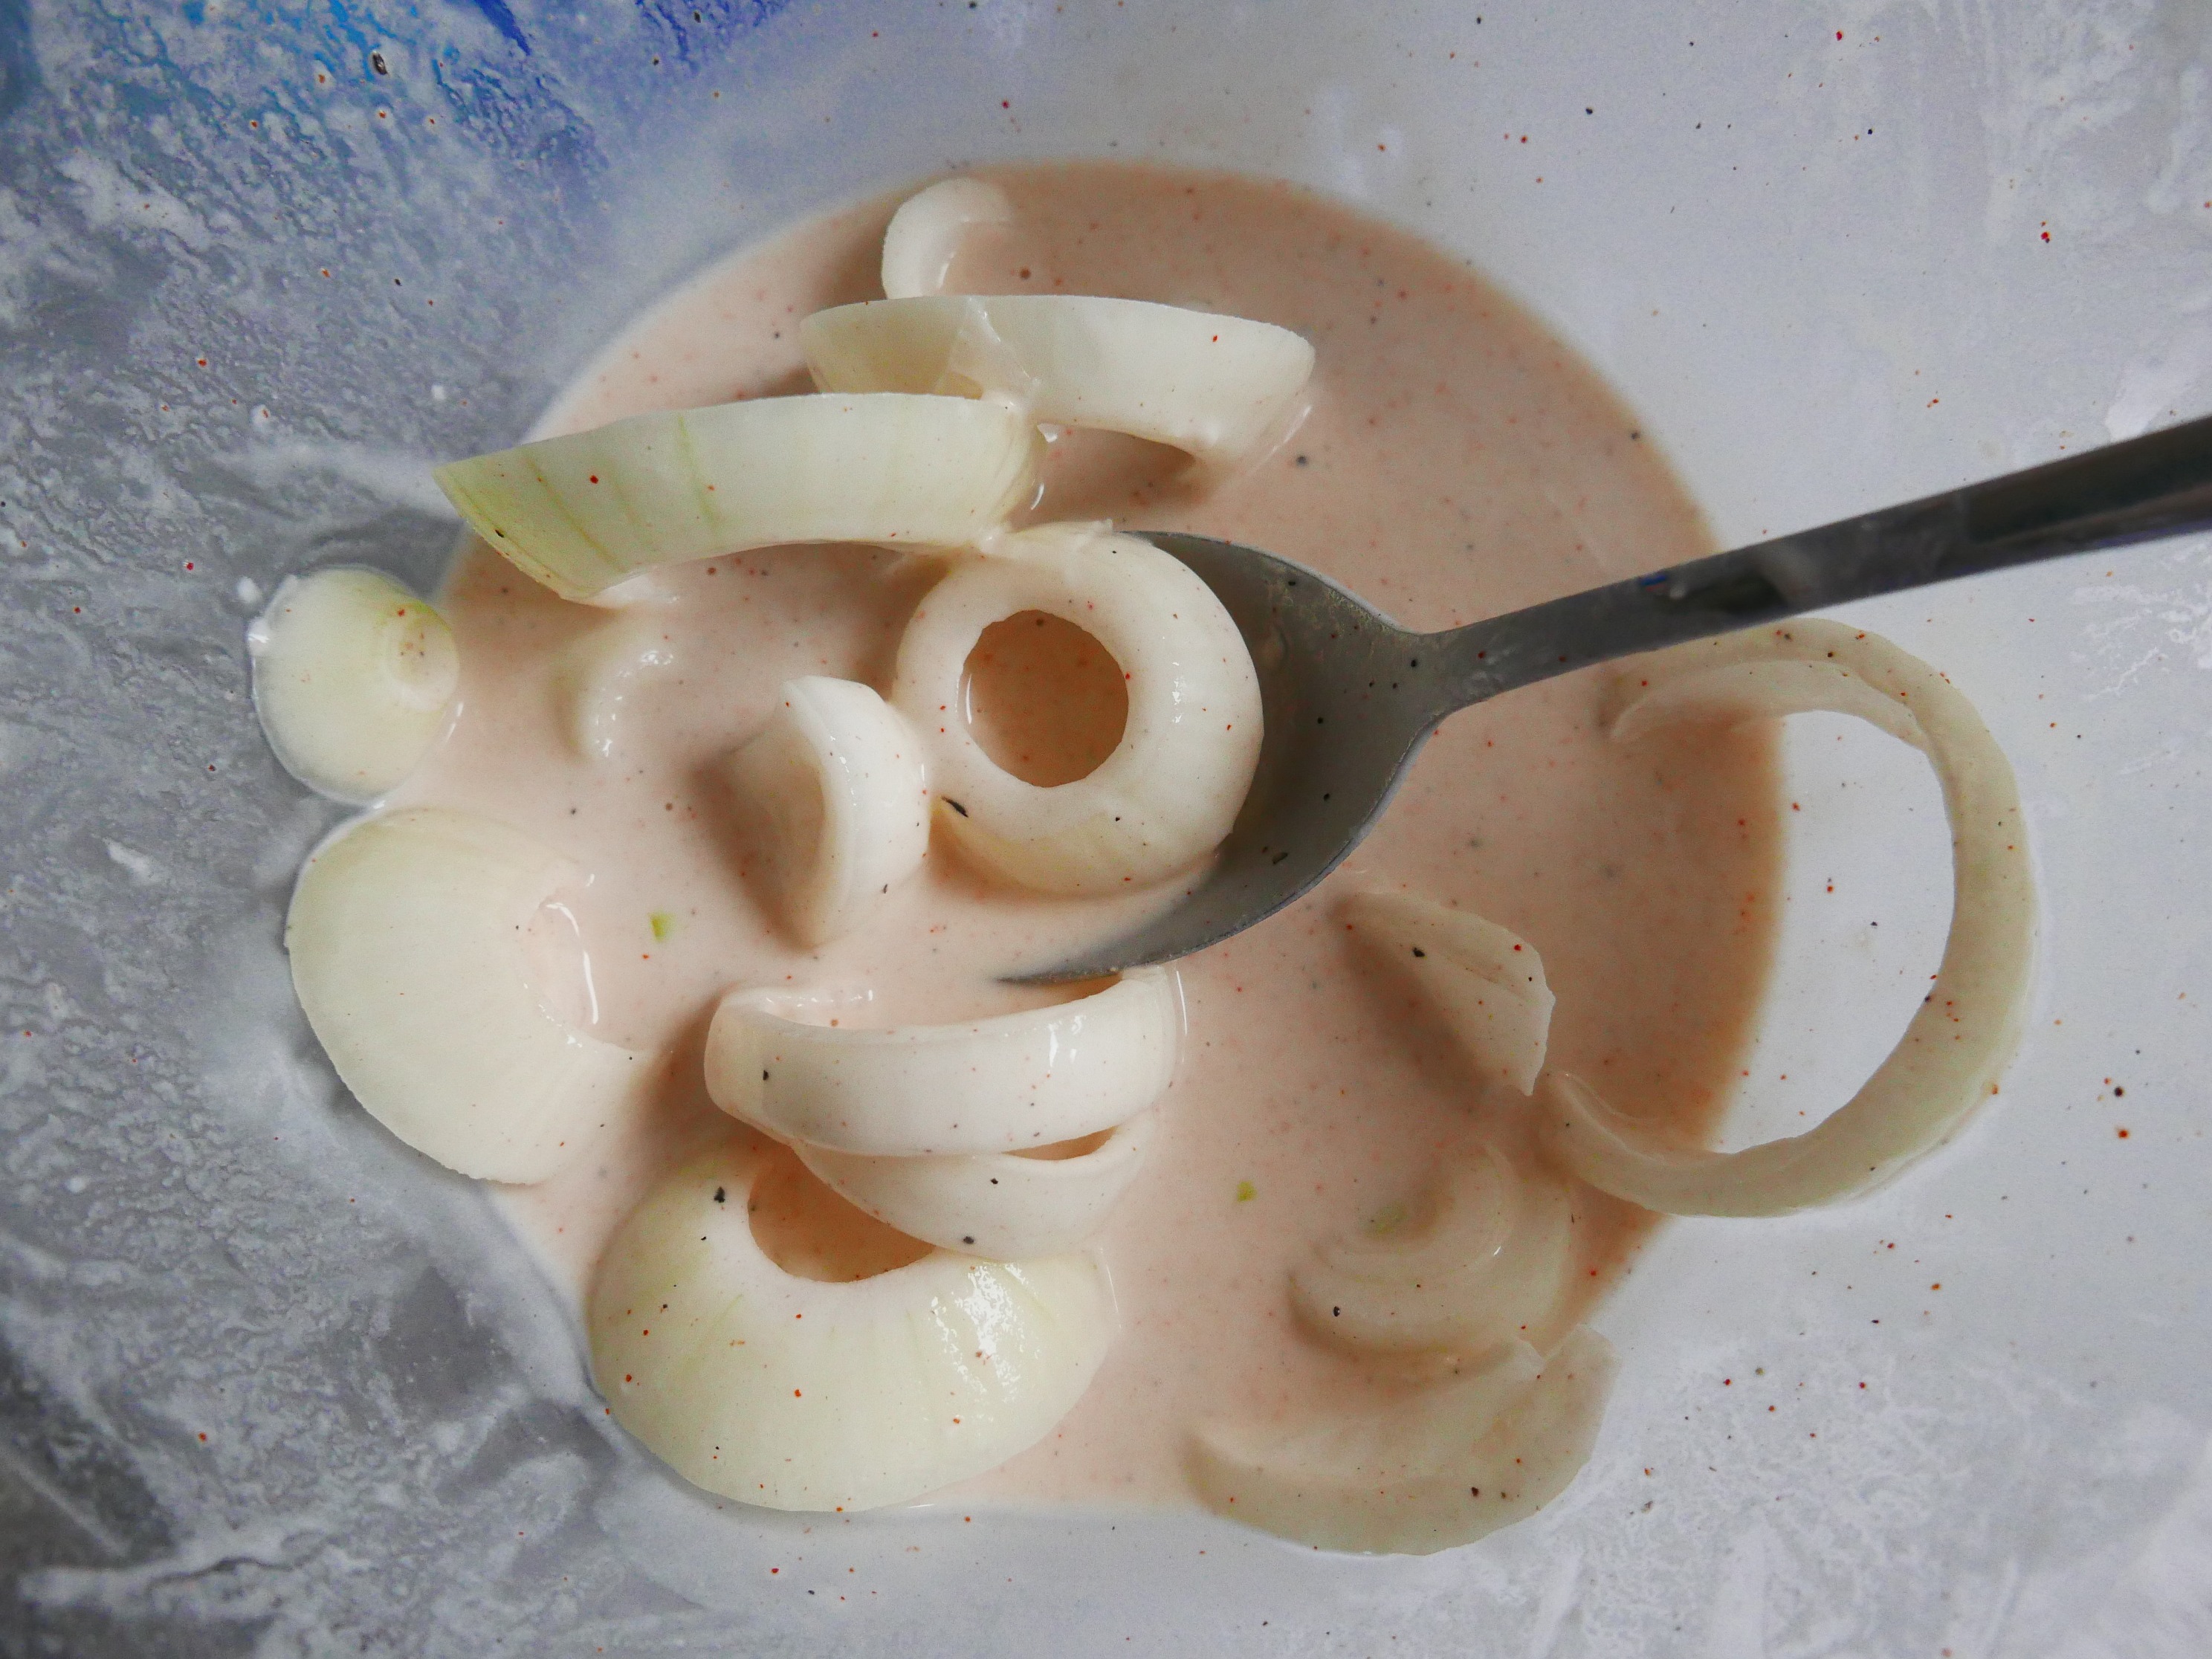
- Put the flour, salt, pepper and cayenne into the bowl and mix together.
- Using a hand whisk, gently add the water until you get a smooth batter – The water will fizz up, but keep stirring – it will settle down very quickly.
- The Batter should be about the thickness of whipping cream. If you prefer a thicker batter, just use less water.
- Toss in the separated Onion rungs and mix well. The batter won’t really stick to the onions, but give each onion ring a last mix before you add it to the oil.
- Heat the oil on a high heat until a little crumb of bread fizzes up and browns quickly when you toss it into the oil.
- Add up to 6 or 7 of the Onion rings to the oil individually – don’t overload the pan, or they’ll all just stick together. Obviously, if you prefer a thicker batter, it will take longer to cook.
- By the time you have the last onion ring in the oil, the first ones will be almost cooked – they’ll drift to the surface, so using your tongs, turn them over to make sure they’re cooked on both sides. Then remove them to the kitchen paper to drain.
I see that I have 9 onion rings in this shot! This separation is about right – you don’t want them crowded..
- As you go on, you’ll need to change the kitchen paper – this is your chance to transfer the cooked and drained onion rings to the baking parchment on the baking tray, and shove it into the oven to keep warm while you cook the rest of the onions.
- The Onion rings will keep quite happily for about 15-20 minutes in the oven before serving.
- Once you’ve finished cooking, remove the pot containing the oil from the heat, cover it, and put it safely out of the way to cool down.
NOTES:
- Once the oil is completely cold, you can strain it and using a funnel, pour it back into the bottle.
- We had our onion rings – they were absolutely delicious!! – with steak tonight, but of course they’ll go with most things to be honest!
I started writing down recipes in an old copybook when I was about 16. With 6 children at home, my Mother was always glad of a hand in the kitchen, and really allowed us to experiment - as long as we washed up afterwards, and left the kitchen immaculate! Having a tidy kitchen has followed me through my life, as has the habit of writing down my favourite recipes; except that these days I write them for my website, and add photographs when I can. The website really started when it occurred to me that my daughter might like to have these recipes when I've forgotten them. In my early days of cooking for family and friends, I used to phone my Mum all the time to ask her for the recipe for some of our favourite family dinners. She rarely had a recipe to hand - I think, like me, she made a lot of it up as she went along.. So welcome to Eating for Ireland - these are the recipes that my friends and family having been eating these past 40 years.. yes, I truly am ancient! They are tried and tested, and have worked for me for all that time - I have updated them as new ingredients became available - I really hope you'll find something that you can make into a family favourite of your own. You don't have to tell anyone where you found these great new dishes that you're serving up - it can be our little secret, but I'd really love it if you could give me a sneaky 'follow' on Facebook and Instagram.. So off you go - have a good rummage around, you're bound to find something new! My sincere thanks to all of you who have found a recipe that you liked and dropped me a line to tell me - I really do love to hear from you! Happy Cooking! Becks xx